Explore the guide
The homeowner’s construction guide
Curbless Showers: A Complete Guide to Design, Waterproofing, Construction, and Cost
A beautiful, step-free shower starts below the tile. Here is how to plan one that drains properly, feels comfortable, and fits the way you live.
LET’S TALK ABOUT YOUR PROJECT
Get a Free Architectural & Construction Estimate
Share your shower ideas, property location and accessibility needs. Let us help you explore the layout and construction scope.
A curbless shower can make a bathroom feel remarkably calm. The floor continues toward the shower without a raised edge, glass becomes less visually intrusive, and entering the space feels natural. It can be a welcome improvement for someone using a walker, a parent helping a child bathe, or anyone planning a home they can enjoy for years.
But removing the curb changes how the bathroom manages water. The floor must provide room for drainage slope. The waterproofing must remain continuous through the entrance. The glass, showerhead, drain, and surrounding fixtures must work together.
That is why the best first question is not which tile to buy. It is: How will this particular floor support a flush entrance and a properly drained shower?
This guide walks through that decision for new construction and remodeling, with separate drawings for wood framing and concrete slabs. You will also find layout comparisons, waterproofing options, accessibility guidance, and a practical way to think about cost.
What makes a shower truly curbless?
A curbless shower has no raised curb to step over at its entrance. The finished bathroom floor meets the shower floor without a deliberate step, while the shower surface slopes toward a drain. “Flush entry” describes the transition; it does not mean the entire shower floor is flat.
The terms in showroom descriptions are not always interchangeable. A walk-in shower may still have a curb. A low-threshold shower reduces the step but does not eliminate it. A doorless shower omits the door, while a curbless shower can have one. A wet room treats a broader portion of the bathroom as a wet area, sometimes placing a bathtub and shower behind the same glass enclosure.
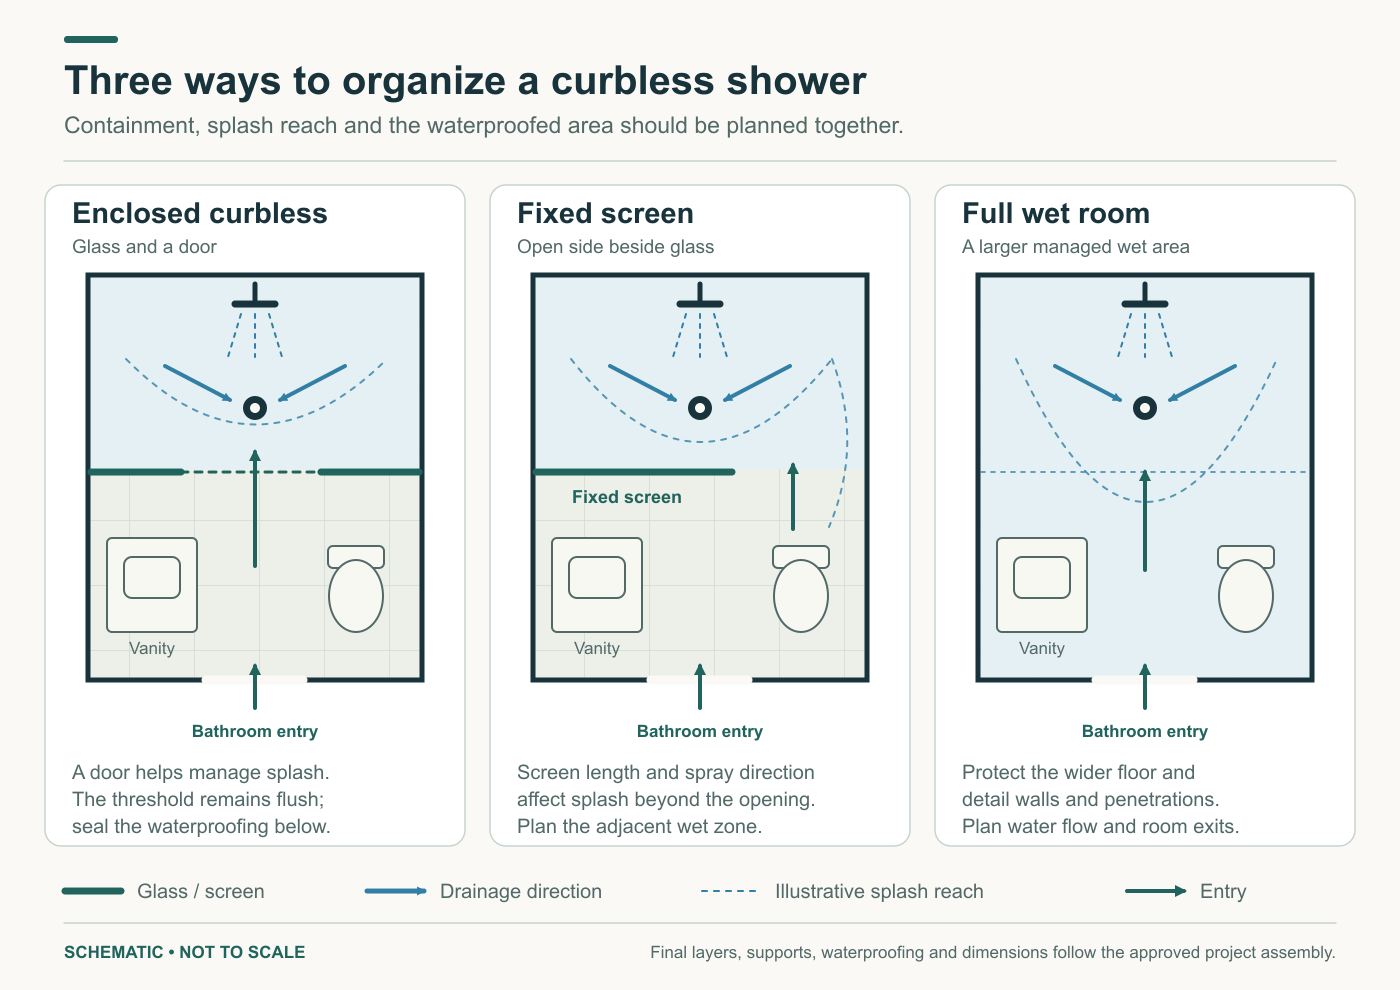
Decide which benefit matters most. If you mainly want easier entry, a curbless shower with a door may be ideal. If you want an open appearance, a fixed screen may deliver it. If someone needs assistance bathing, maneuvering space and control placement deserve more attention than the photograph that inspired the project.
Open drawing at full size ↗
Finished shower examples
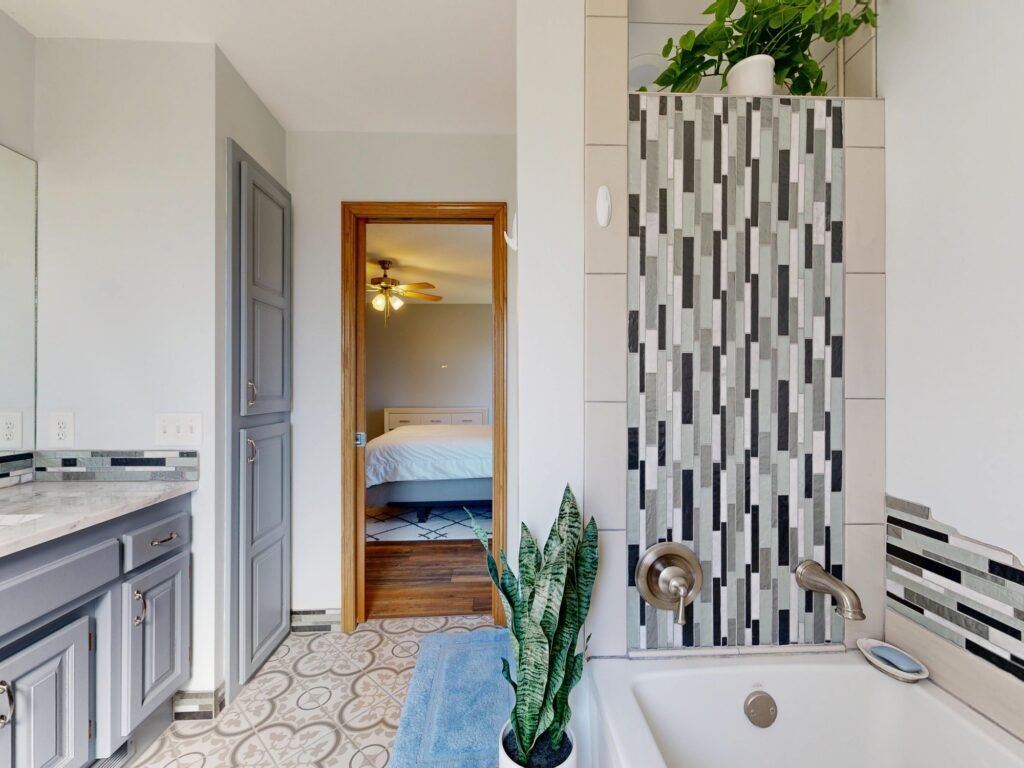
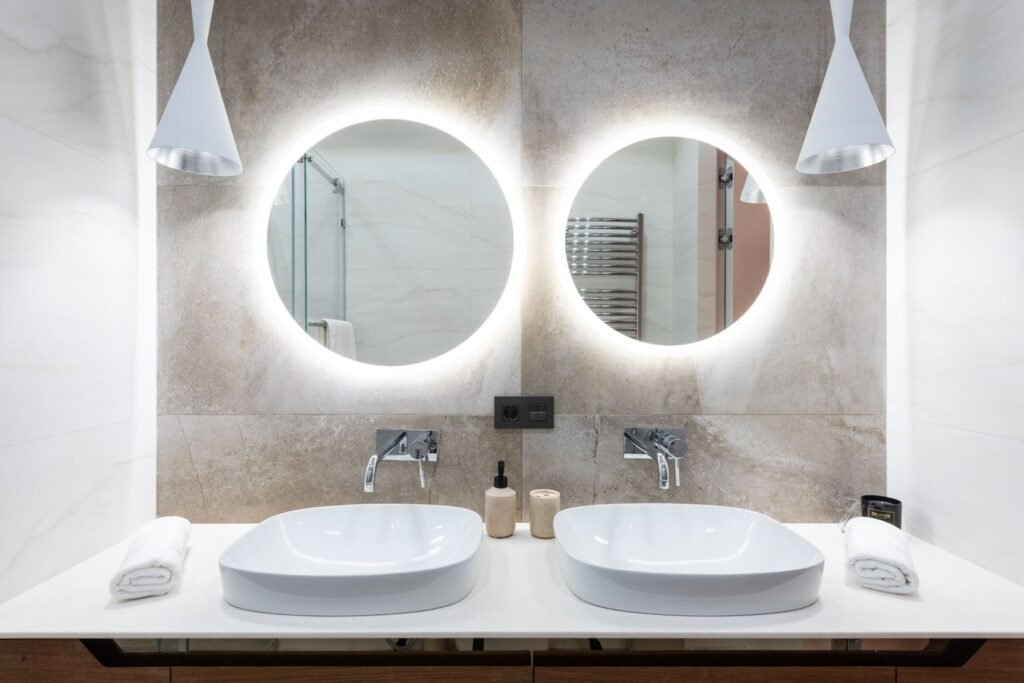
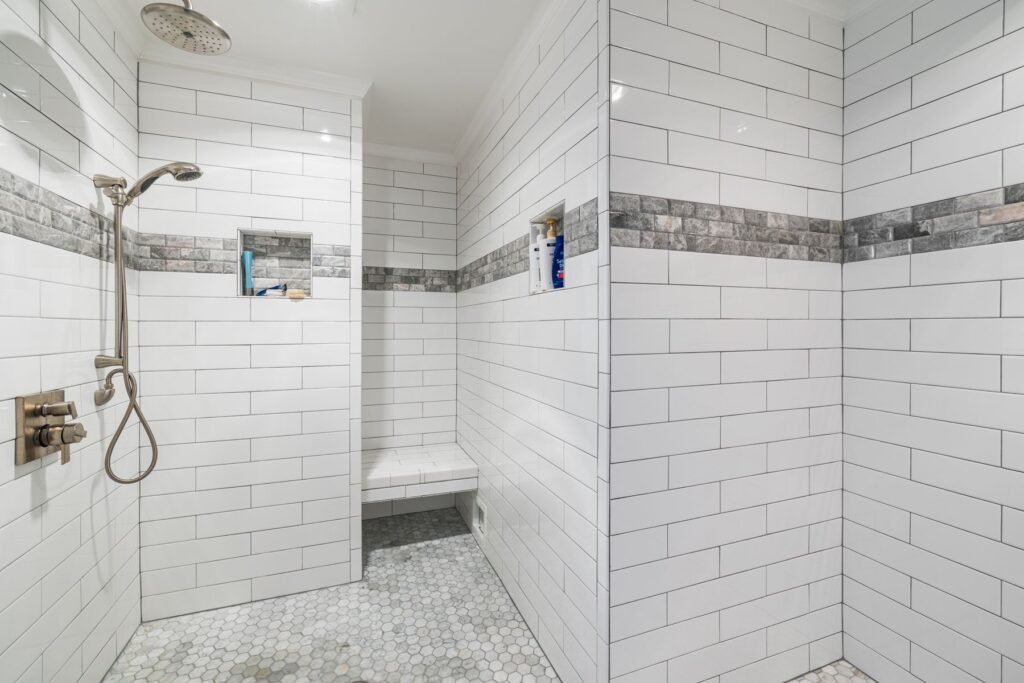
These royalty-free stock photos show finish ideas that can be used in a curbless design: small-format shower-floor tile, open glass, a bench or niche, and coordinated wall surfaces. A finished photo cannot verify the hidden slope, waterproofing, or exact threshold detail, so treat these as visual references rather than construction proof or Remodeling Contractor Pro project photos.
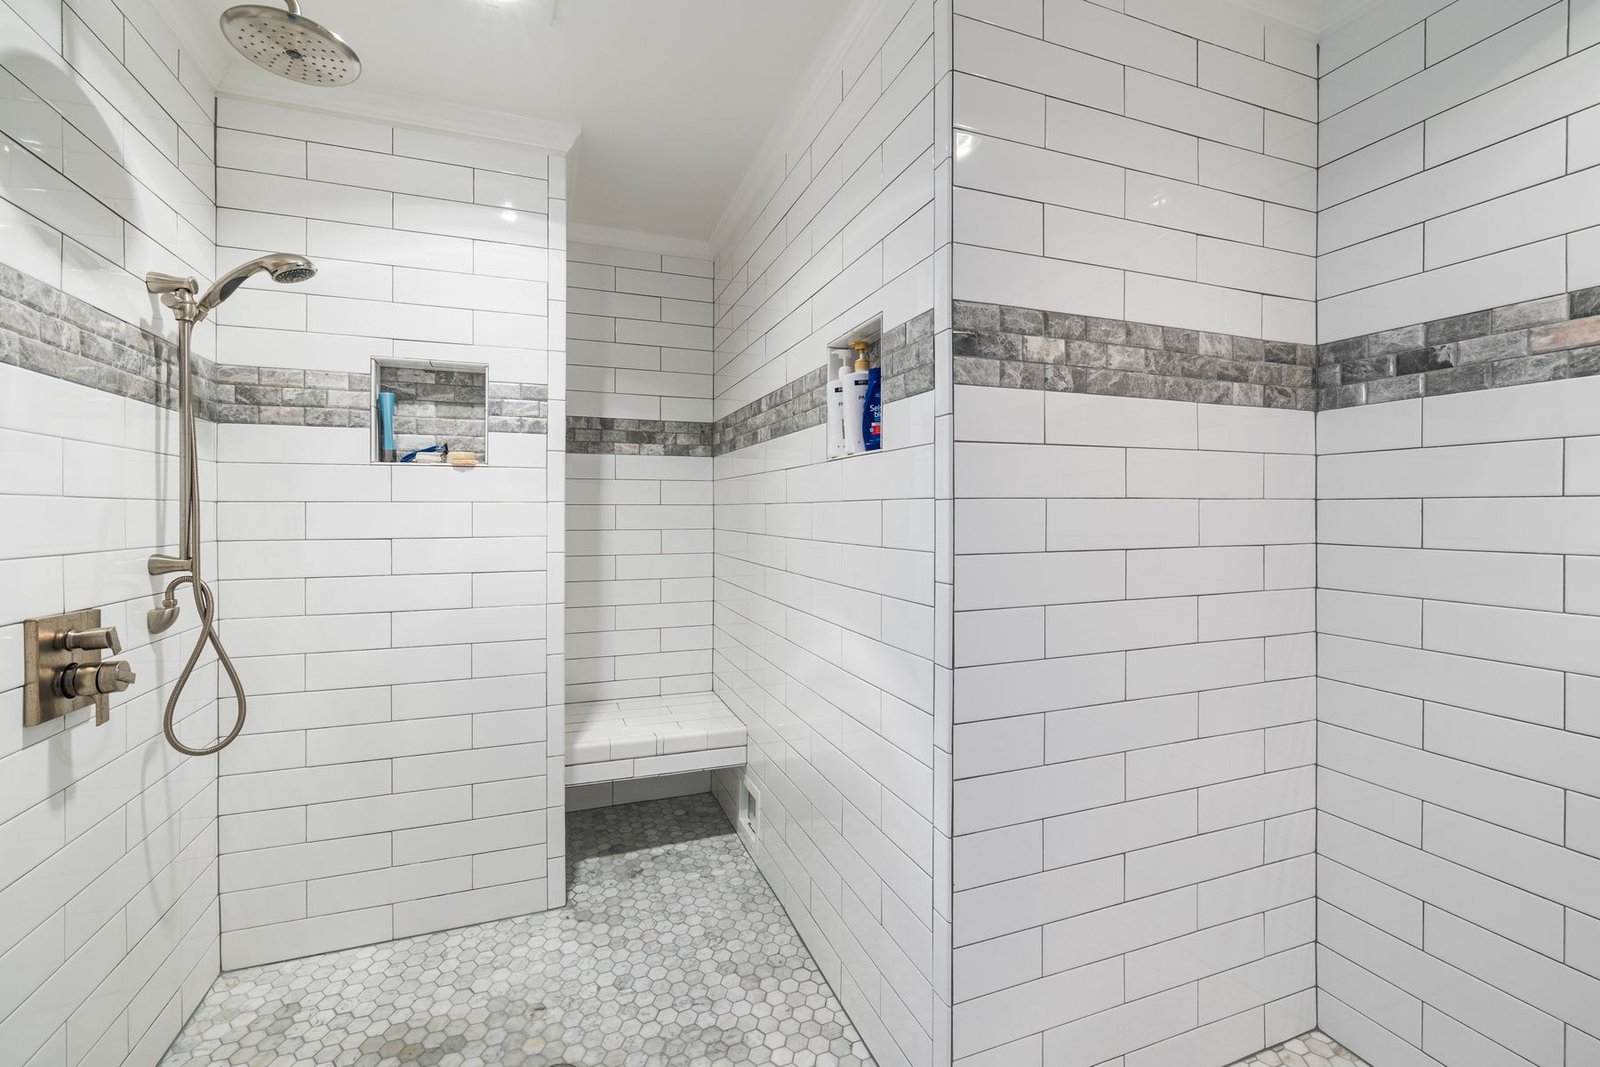
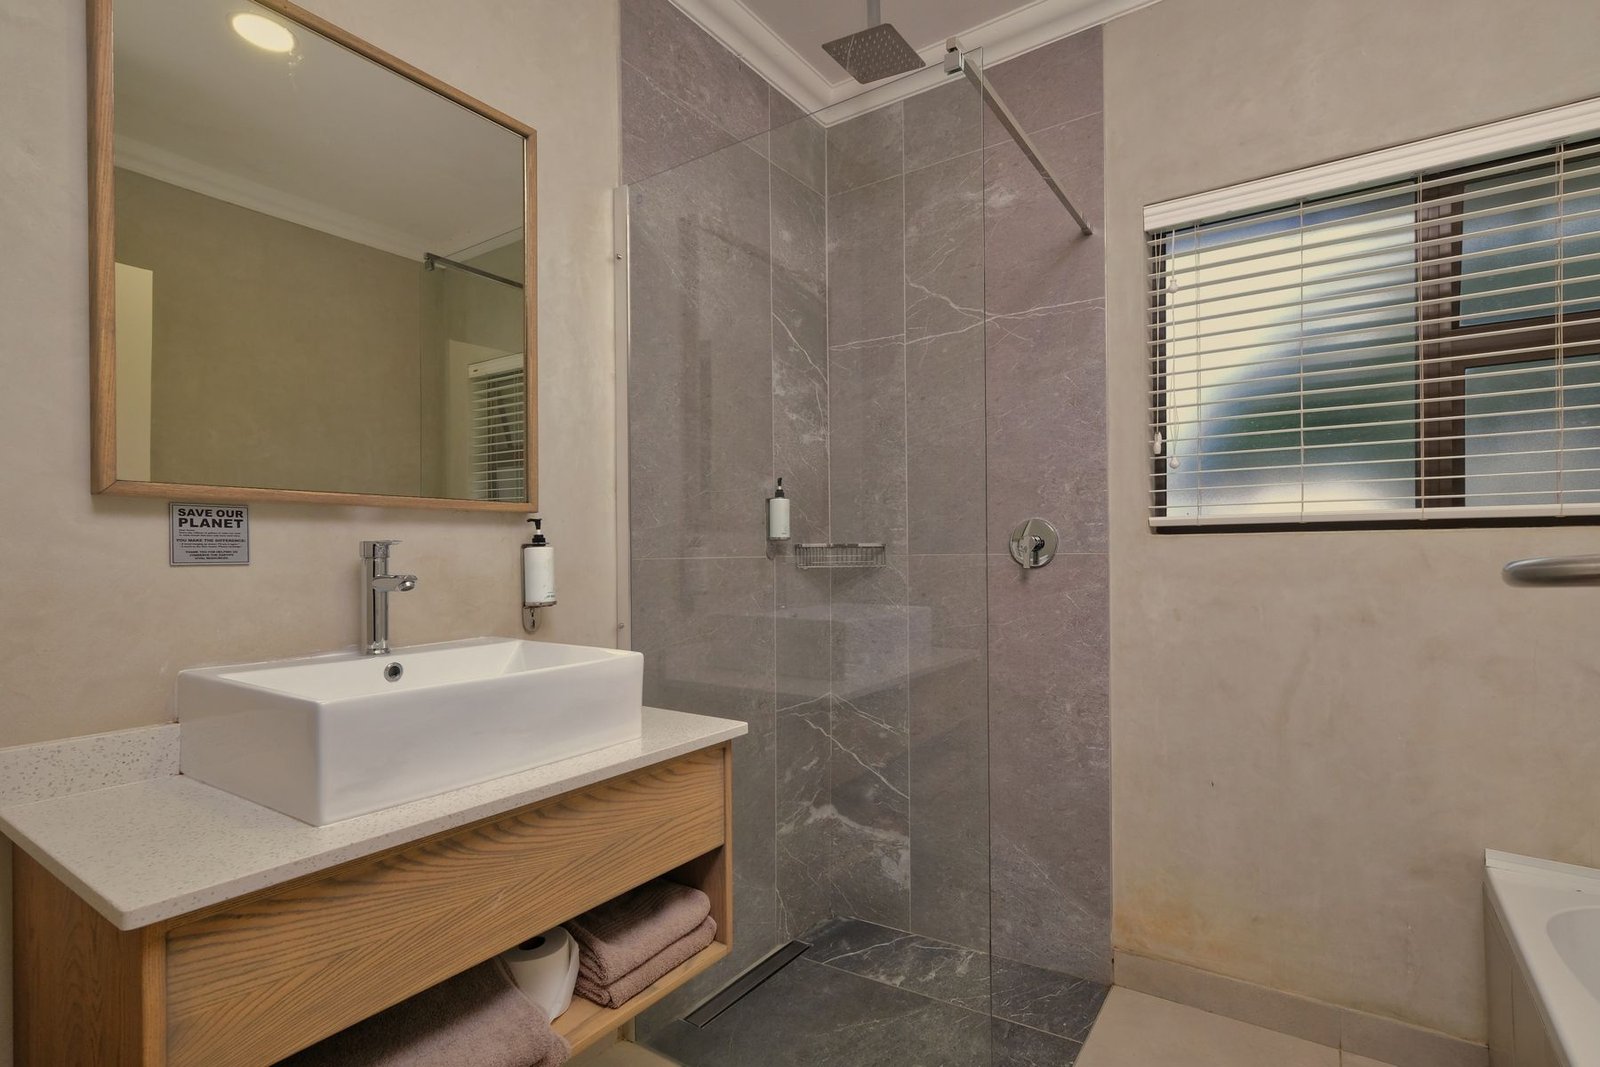
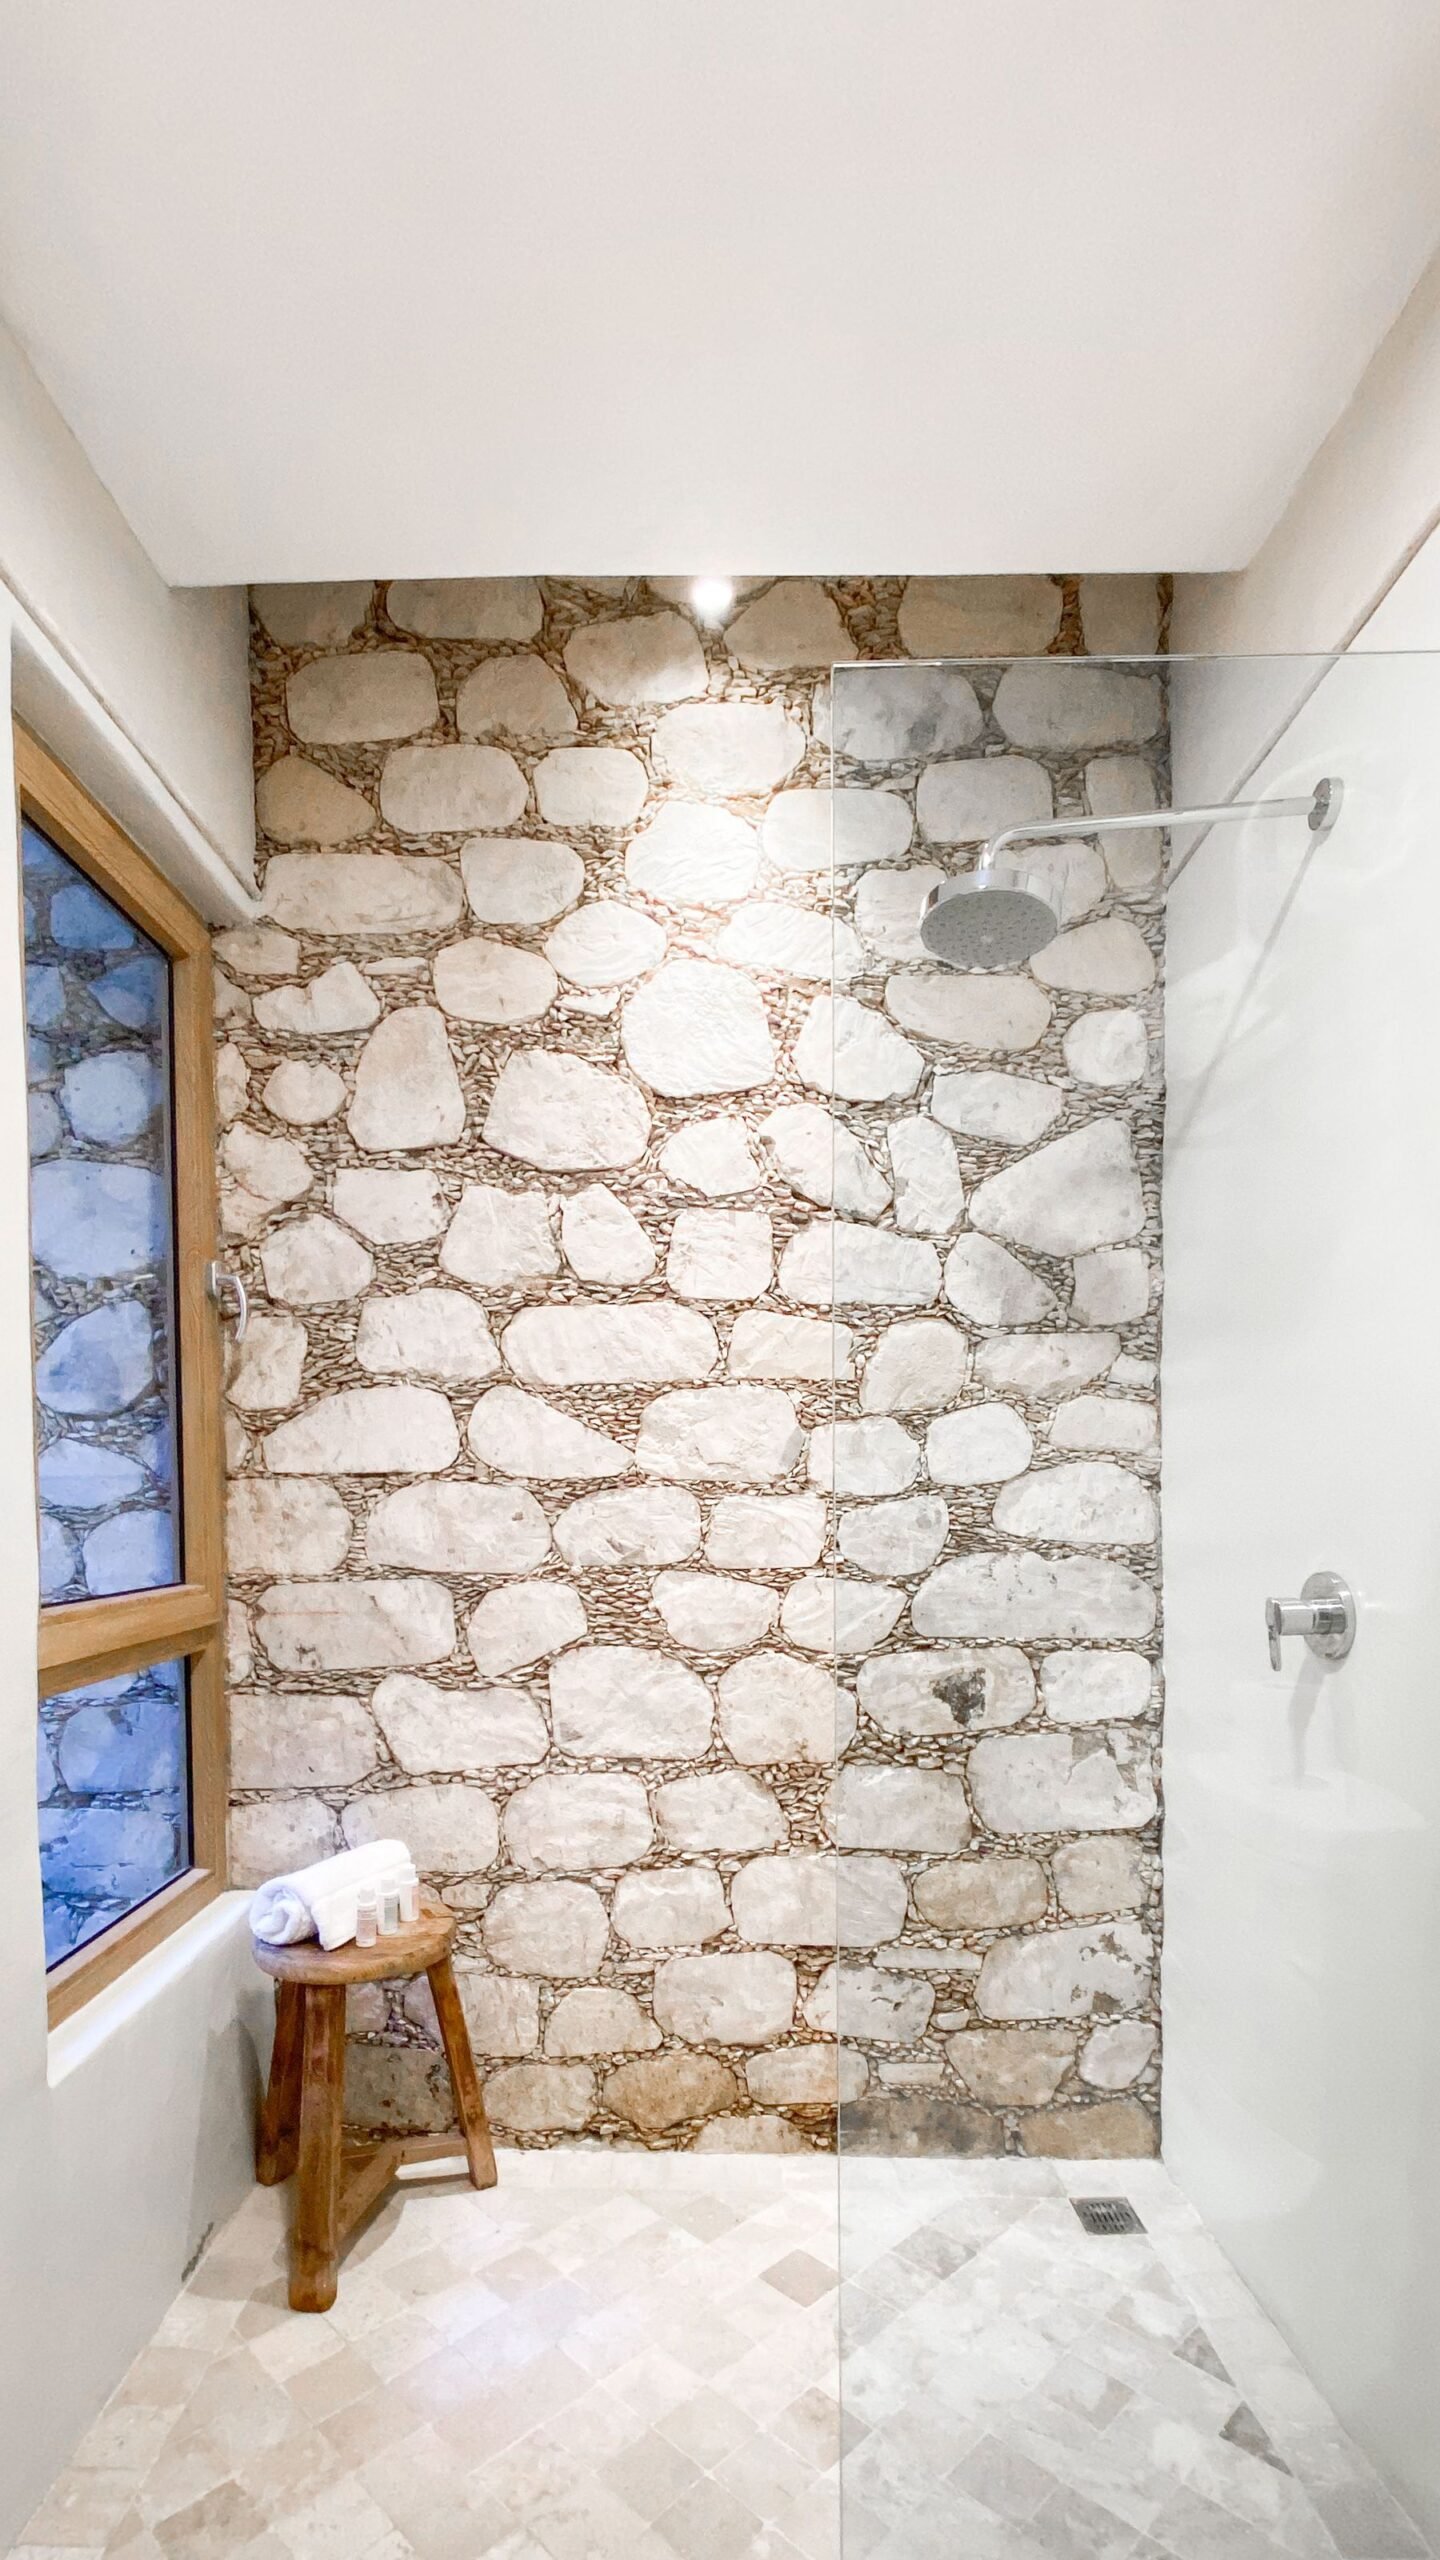
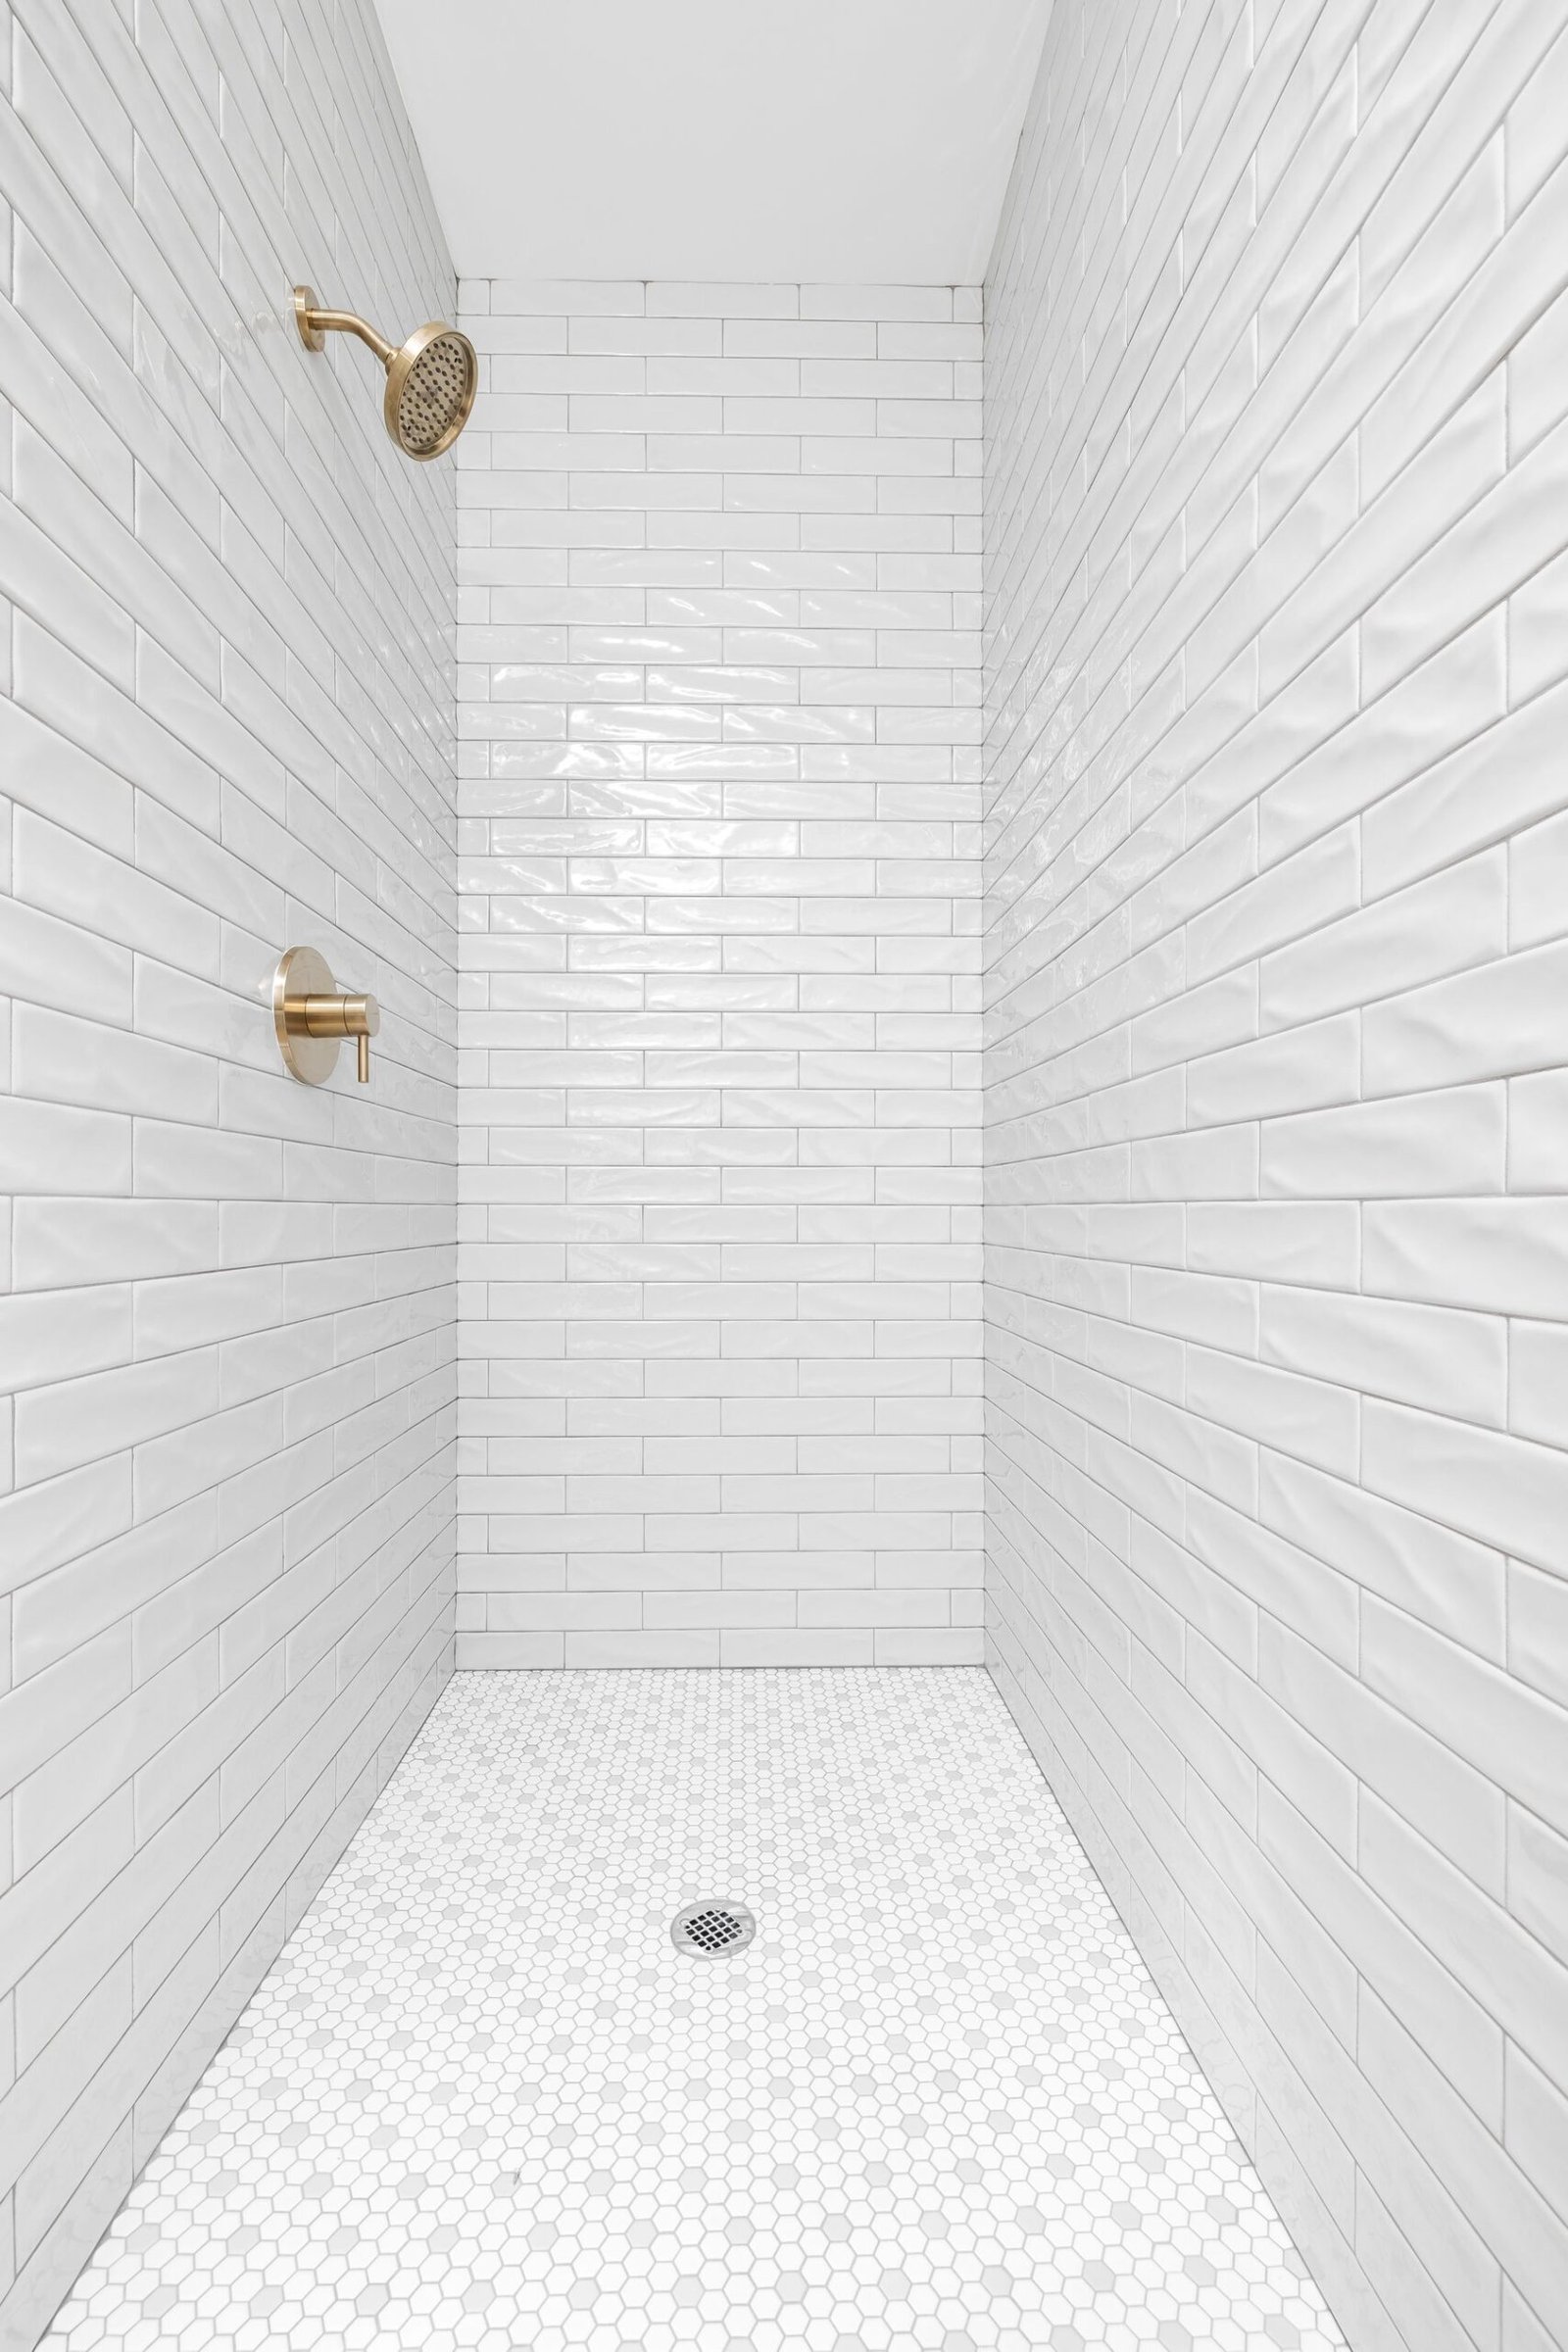
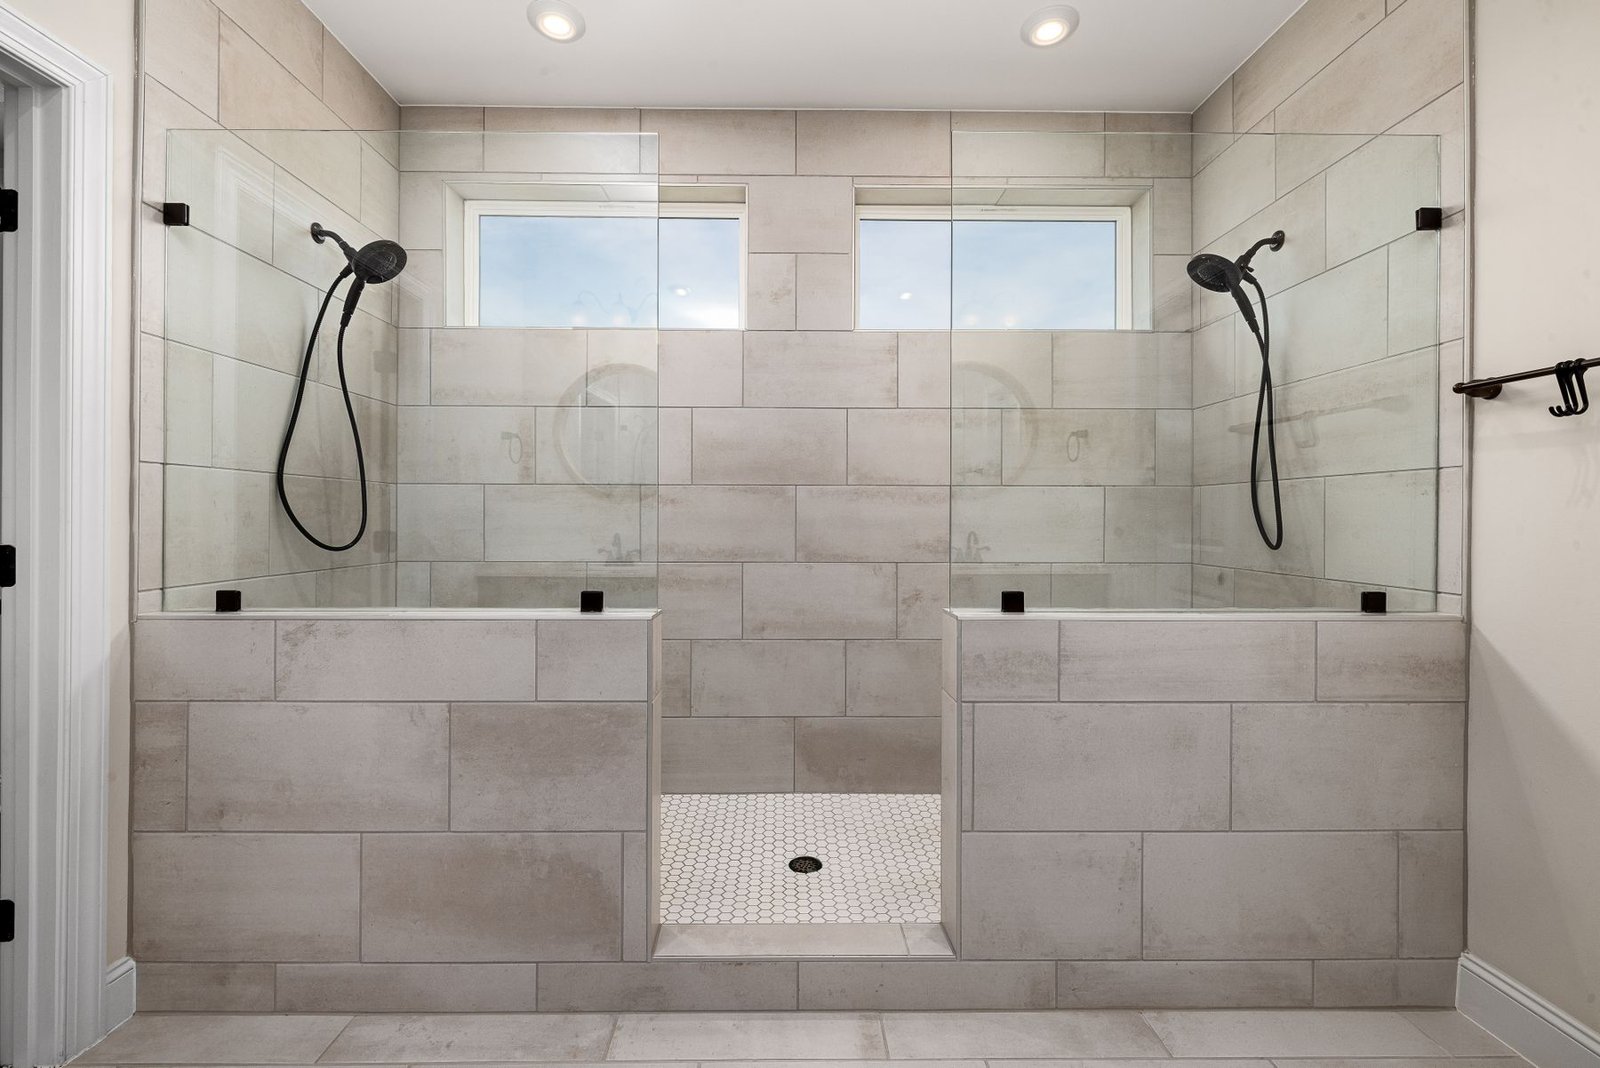
Pexels lists each photo as free to use under its license. The credits above are included as source information; the photos are illustrative stock photography.
The benefits—and the compromises worth knowing
Easier movement and a more open room
Eliminating a curb removes one obstacle from the bathing route. It also lets the floor read as a continuous surface, which can make a compact bathroom feel less divided. You can coordinate the shower and bathroom tile without building a raised border around the wet area.
Cleaning can be simpler because there is no curb top, inside curb face, or bottom door track to scrub, depending on the enclosure. However, a linear drain, textured tile, and large glass panel still require maintenance. “Curbless” does not mean maintenance-free.
More careful water control
Without a raised barrier, escaping spray and slow drainage become more noticeable. An open shower may wet the drying area, feel draftier, or leave towels within splash range. A poorly placed bench can consume the entry clearance you hoped to gain.
Construction can also extend beyond the shower footprint. You may need to replace adjacent flooring, modify the floor assembly, relocate plumbing, or resolve a height difference at the bathroom doorway. A shower-only budget can turn into a bathroom project when those connections are investigated.
There is no universal resale premium to promise. Choose the design for its usefulness and quality. If it means removing the home’s only bathtub, consider the needs of your household and likely future users before committing.
For some homes, a carefully designed low-threshold shower is the more practical compromise. A trustworthy evaluation should explain that option when achieving a truly flush entry would require disproportionate structural work.
Start with floor heights, not demolition
The floor design should identify the bathroom’s finished elevation, the shower entrance elevation, the drain elevation, and every layer between the structure and the tile. Looking only at the thickness of a shower tray misses the tile, setting material, supporting substrate, and plumbing connection.
There are three broad strategies: recess the shower assembly, raise the surrounding bathroom floor, or use a designed ramped approach. Each solves the height problem differently. A ramp needs space; raising the bathroom floor affects the doorway and fixtures; recessing depends on the structure. Schluter illustrates these three approaches.
New construction: decide before framing or pouring
In a new house, addition, or new bathroom, the design team can coordinate a floor depression, joist arrangement, and drain route before those elements are built. Select the shower footprint and drainage system early enough for the framing and plumbing drawings to reflect them.
Changing from a center drain to a wall drain after rough construction can change the slope direction and required depth. Likewise, choosing a much thicker floor tile late can interfere with the intended transition. Early decisions protect the design as well as the budget.
Remodeling: investigate what is already there
In an existing bathroom, begin with measurements and access. Determine whether the floor is wood framed, slab on grade, or a structural slab above another space. Check the drain location, surrounding floor height, and evidence of previous leakage.
Ask the contractor to identify what can be confirmed before demolition and what remains an allowance. A small investigation may answer a question that a photograph cannot. In a condominium, access, association approvals, sound requirements, and responsibility for the slab or piping may also affect the available options.
Raising the bathroom floor can avoid some recess work, but the transition into the room needs its own solution. Otherwise, you may move the step from the shower entrance to the bathroom door. Manufacturer examples show raised-floor assemblies over both wood and concrete.
How a curbless shower works over wood framing
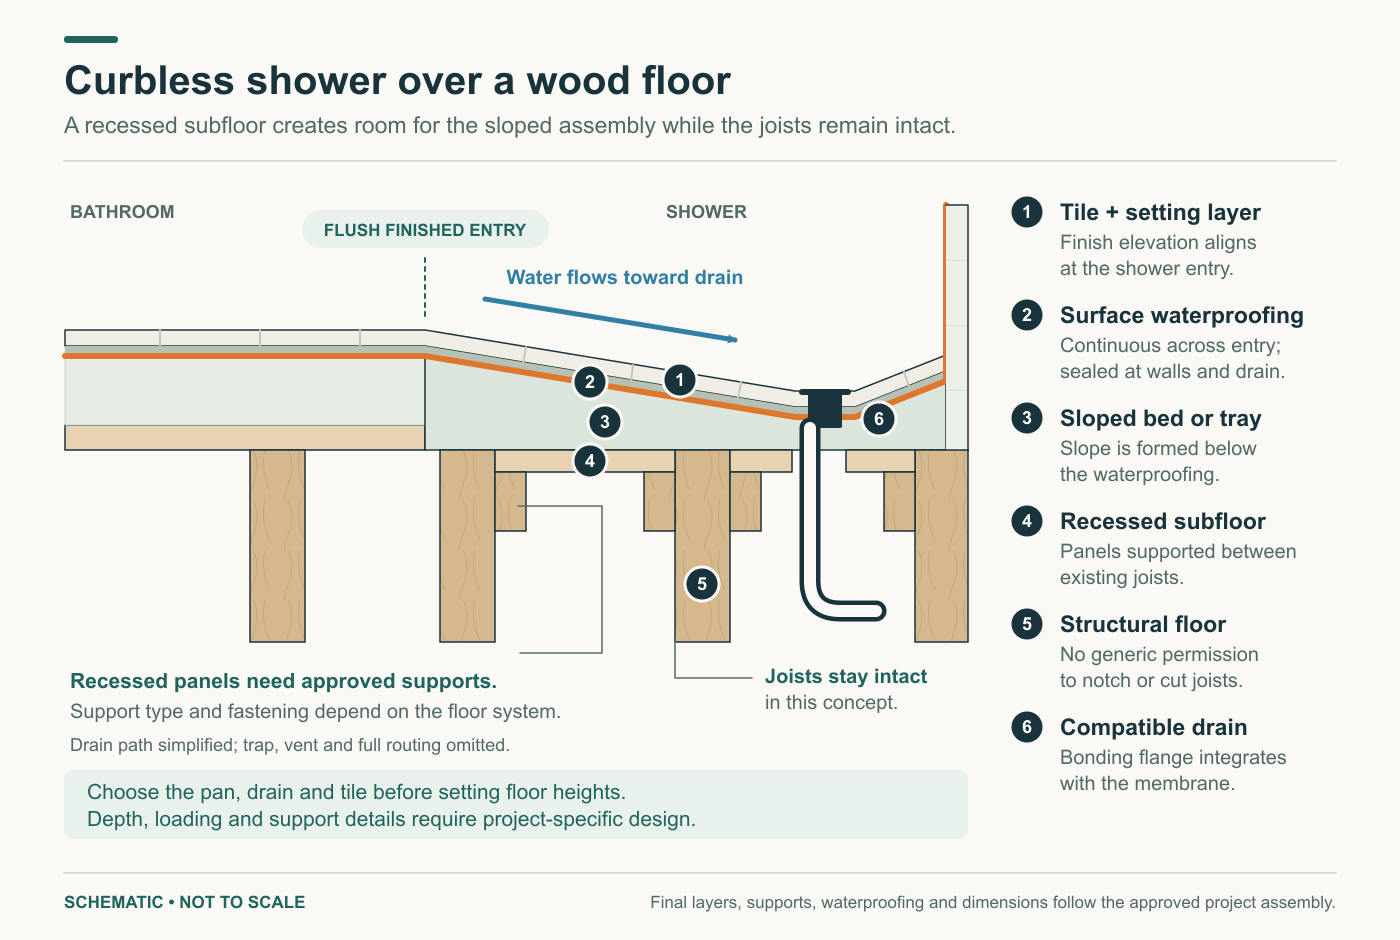
On a wood-framed floor, the challenge is fitting the sloped shower assembly into the available depth while maintaining structural support. One approach places supported subfloor panels between the joists, lowering their surface relative to the surrounding subfloor. A compatible shower tray or mortar assembly then builds back up to the planned entrance elevation.
This is different from cutting down the tops of the joists. Engineered I-joists, floor trusses, and dimensional lumber have different limitations. Any proposed alteration must follow the applicable structural design and manufacturer requirements.
For example, Schluter’s KERDI-SHOWER-FRS brackets provide a specified way to support recessed subfloor panels without cutting or notching joists. The current system includes applications with dimensional lumber and I-joists, subject to its installation requirements. That does not make every existing floor suitable for the same detail. See the manufacturer’s recessing-system guidance.
Open drawing at full size ↗
Drain placement should be checked against the joist layout before ordering the pan. A drain body that lands over a joist creates a problem that cannot be solved by casually moving the tile opening. Moving the drain, choosing a different approved system, or redesigning the structure may be necessary.
For an upstairs bathroom, include access to the plumbing connection and repairs to any ceiling opened below. Ask how floor stiffness will be evaluated for the selected tile and assembly. Cracked grout should not become the first indication that the supporting floor was unsuitable.
How a curbless shower works on a concrete slab
A planned recess in a new slab
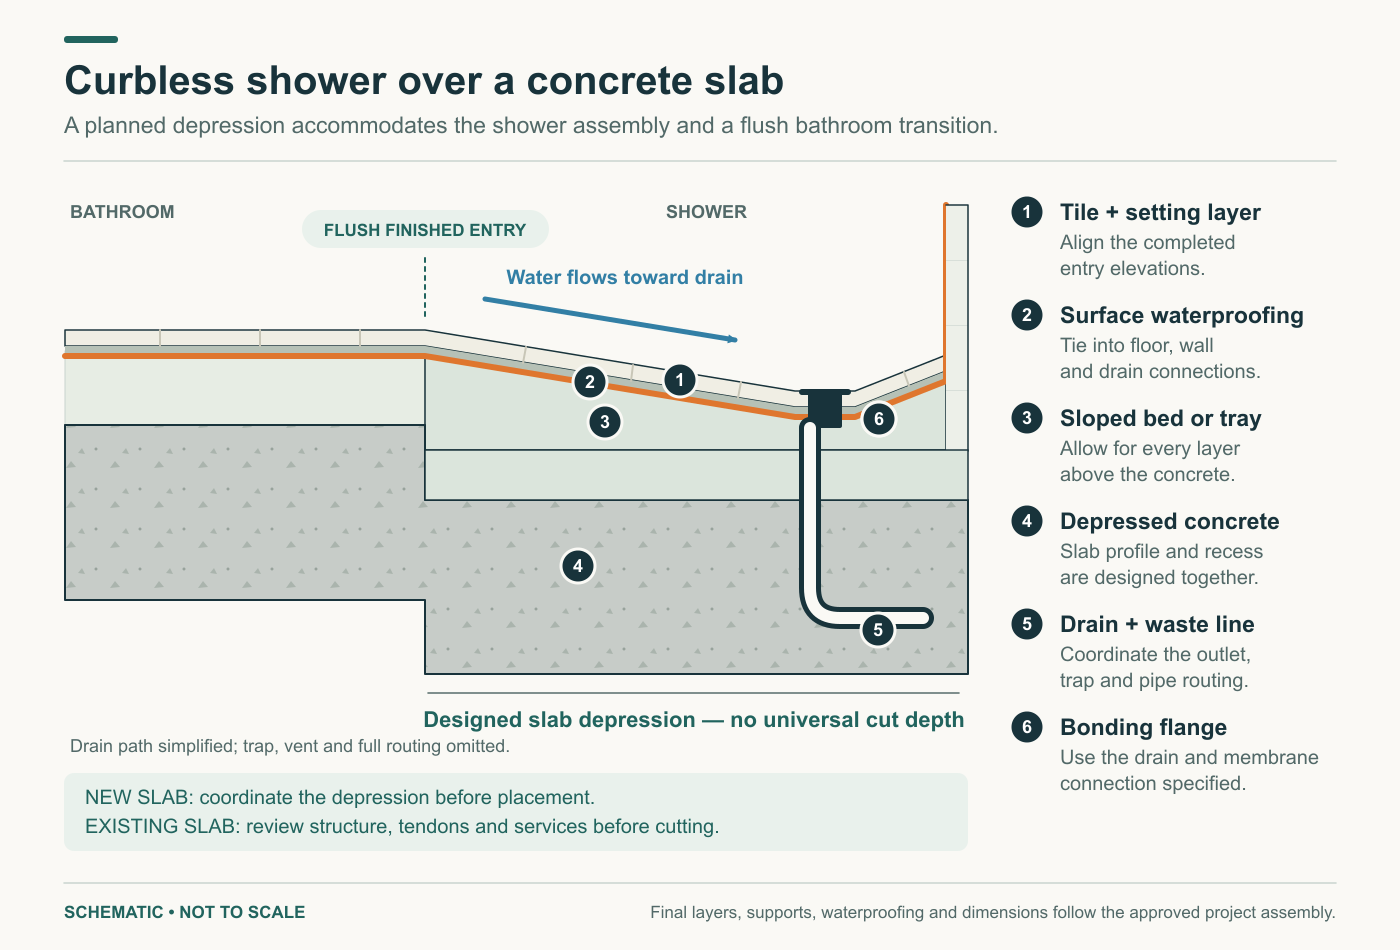
For new construction, the structural and plumbing design can incorporate a depressed shower area before the concrete is placed. The depression accommodates the selected shower assembly, while the finished entry aligns with the bathroom floor.
There is no single recess depth that works for every shower. A factory pan, custom mortar bed, point drain, and linear drain can require different elevations. LATICRETE’s barrier-free assembly details show separate recessed-concrete and recessed-wood conditions, reinforcing why the complete assembly must be selected first. View LATICRETE’s assembly manual.
Open drawing at full size ↗
An existing slab needs a different investigation
A remodel may require removing concrete for the drain, rebuilding a recessed area, or raising the surrounding floor. Before selecting any cutting method, identify the slab construction and embedded services.
Post-tensioned concrete requires particular care. The Post-Tensioning Institute identifies drilling and coring after construction as potential causes of tendon damage and failure. Determine the slab’s reinforcement and obtain the necessary structural direction before cutting. Scanning helps locate embedded elements; it does not by itself approve a structural alteration. PTI explains these damage risks.
Also ask how any disturbed vapor barrier, plumbing trenches, and slab repairs will be addressed. If recessing is impractical, compare a raised-floor design with a low-threshold alternative. The useful proposal explains the resulting bathroom elevations, rather than promising that concrete can simply be chipped away until the shower fits.
Waterproofing methods: choose a complete system
Tile and grout are the visible finish. They are not a substitute for a designed waterproofing assembly. Even a water-durable backer board may need separate waterproofing: USG specifically describes Durock cement board as water durable, but not waterproof. USG’s wet-area guidance explains the distinction.
Bonded sheet membranes
A bonded sheet membrane sits directly beneath the tile setting material, over a properly prepared sloping substrate. Systems such as Schluter KERDI use specified connections at seams, corners, penetrations, and the drain. Factory components can simplify those transitions, but the installation still depends on correct bonding and complete connections.
In this approach, the waterproofing follows the drainage slope. A flat waterproof layer hidden beneath tile that slopes only at the surface is not an equivalent assembly. Schluter’s shower handbook shows the sequence and system details.
Liquid-applied membranes
Liquid products, including appropriate LATICRETE HYDRO BAN and CUSTOM RedGard systems, form waterproof coatings over approved substrates. Their suitability depends on the exact product, substrate preparation, drain connection, coverage, and curing conditions.
A surface changing color is not sufficient evidence that the correct coating thickness was achieved. Wet-film measurements and coverage checks matter. Thin areas, pinholes, and inadequately treated transitions must be corrected before testing and tiling. CUSTOM explains coverage and film thickness.
Waterproof foam-board and shower-pan systems
Systems such as wedi combine waterproof panels and pre-sloped shower bases with their specified joint treatments and drains. A factory slope can reduce field shaping, especially in a compatible footprint. Cutting or modifying a pan still needs to follow its instructions; the remaining geometry must suit the shower.
The waterproof core does not eliminate joint work. Connections, fasteners, corners, and the transition to the bathroom floor remain essential. The wedi Fundo Ligno instructions illustrate this system approach.
Traditional liners and mortar beds
Traditional liner assemblies use a different drainage strategy, with a liner over a pre-slope and a compatible clamping drain. Water reaching the liner must have a path to the drain’s weep openings. Oatey’s installation guidance shows why the liner is not simply laid flat beneath the mortar. See Oatey’s liner installation sequence.
Hot-mop and other approved traditional methods also need a complete, suitable curbless detail. A method commonly used for curbed showers should not be assumed to transfer unchanged to a flush entrance. Ask for the proposed drain, membrane, entry transition, and inspection requirements in writing.
The entrance is part of the waterproofing
At the open edge, shower waterproofing must connect to the protection specified for the adjacent wet and drying areas. Identify that boundary on a drawing, including floor-to-wall junctions and the bathroom doorway. Waterproofing the whole bathroom floor can be a sensible design choice, but it does not make cabinets, wall bases, and door openings automatically waterproof.
For example, DITRA requires sealed seams and transitions to function as a continuous waterproof floor assembly. The mat alone is not the finished connection. Consult the DITRA installation requirements.
Avoid improvised combinations of membranes, sealants, and drains. Different brands can sometimes be used together through approved details, but that compatibility should be established before installation. Extra layers are not automatically better waterproofing.
Center drain or linear drain?
A curbless shower does not require a linear drain. A point drain can work well when the floor slopes toward it from several directions. Small-format tile often follows those planes conveniently; larger tile may need carefully planned cuts.
A wall-positioned linear drain can allow one primary sloping plane, which can simplify a large-format tile layout. The exact drain must suit its location and waterproofing system. Schluter’s KERDI-LINE guidance also addresses entrance placement, where drain width and grate design affect water collection. See KERDI-LINE placement guidance.
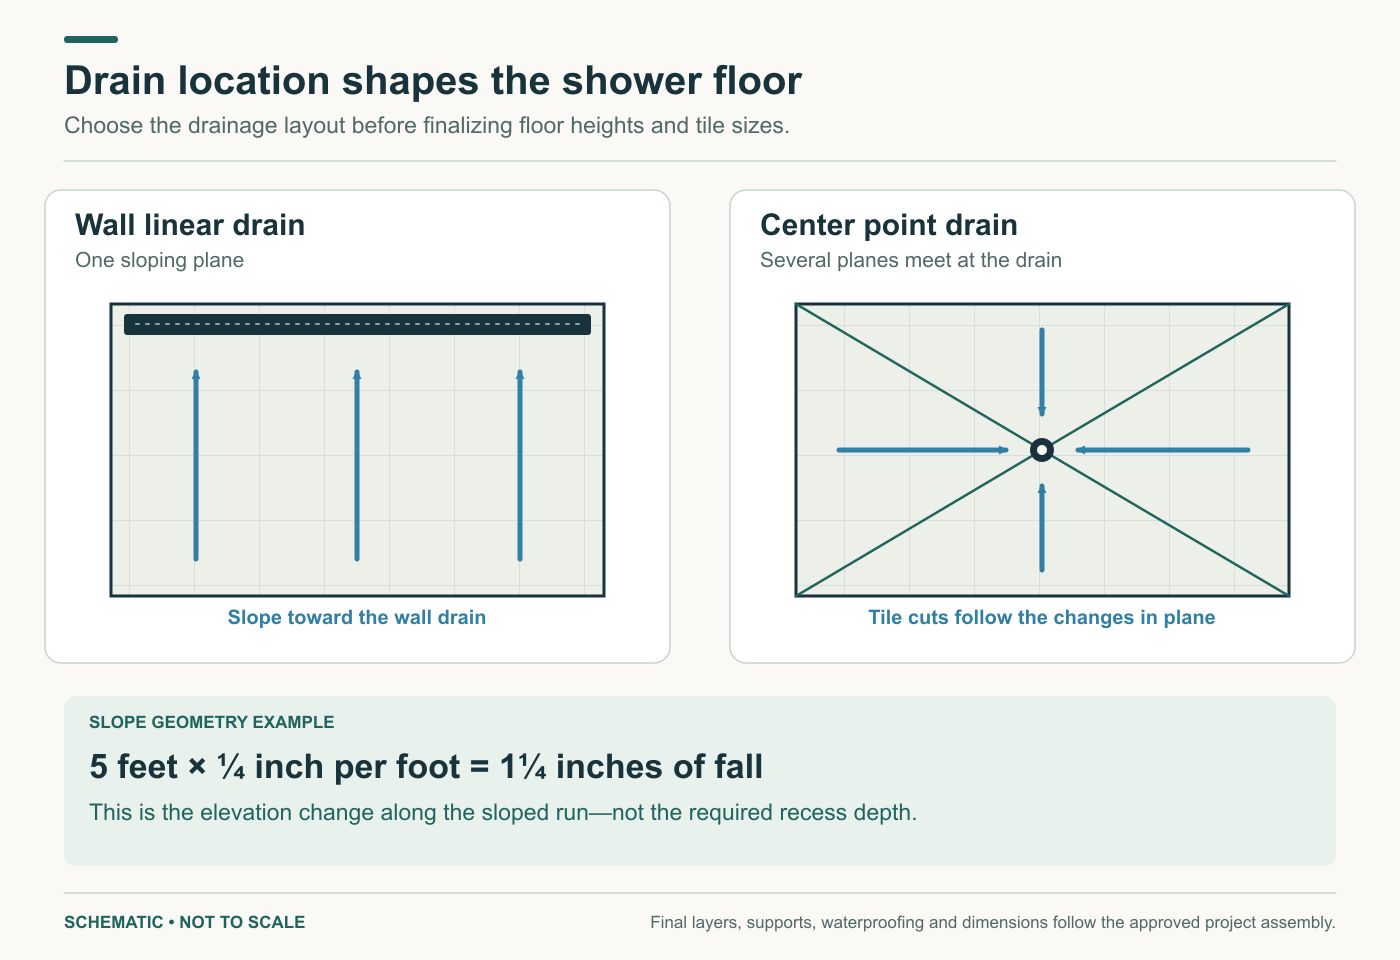
Open drawing at full size ↗
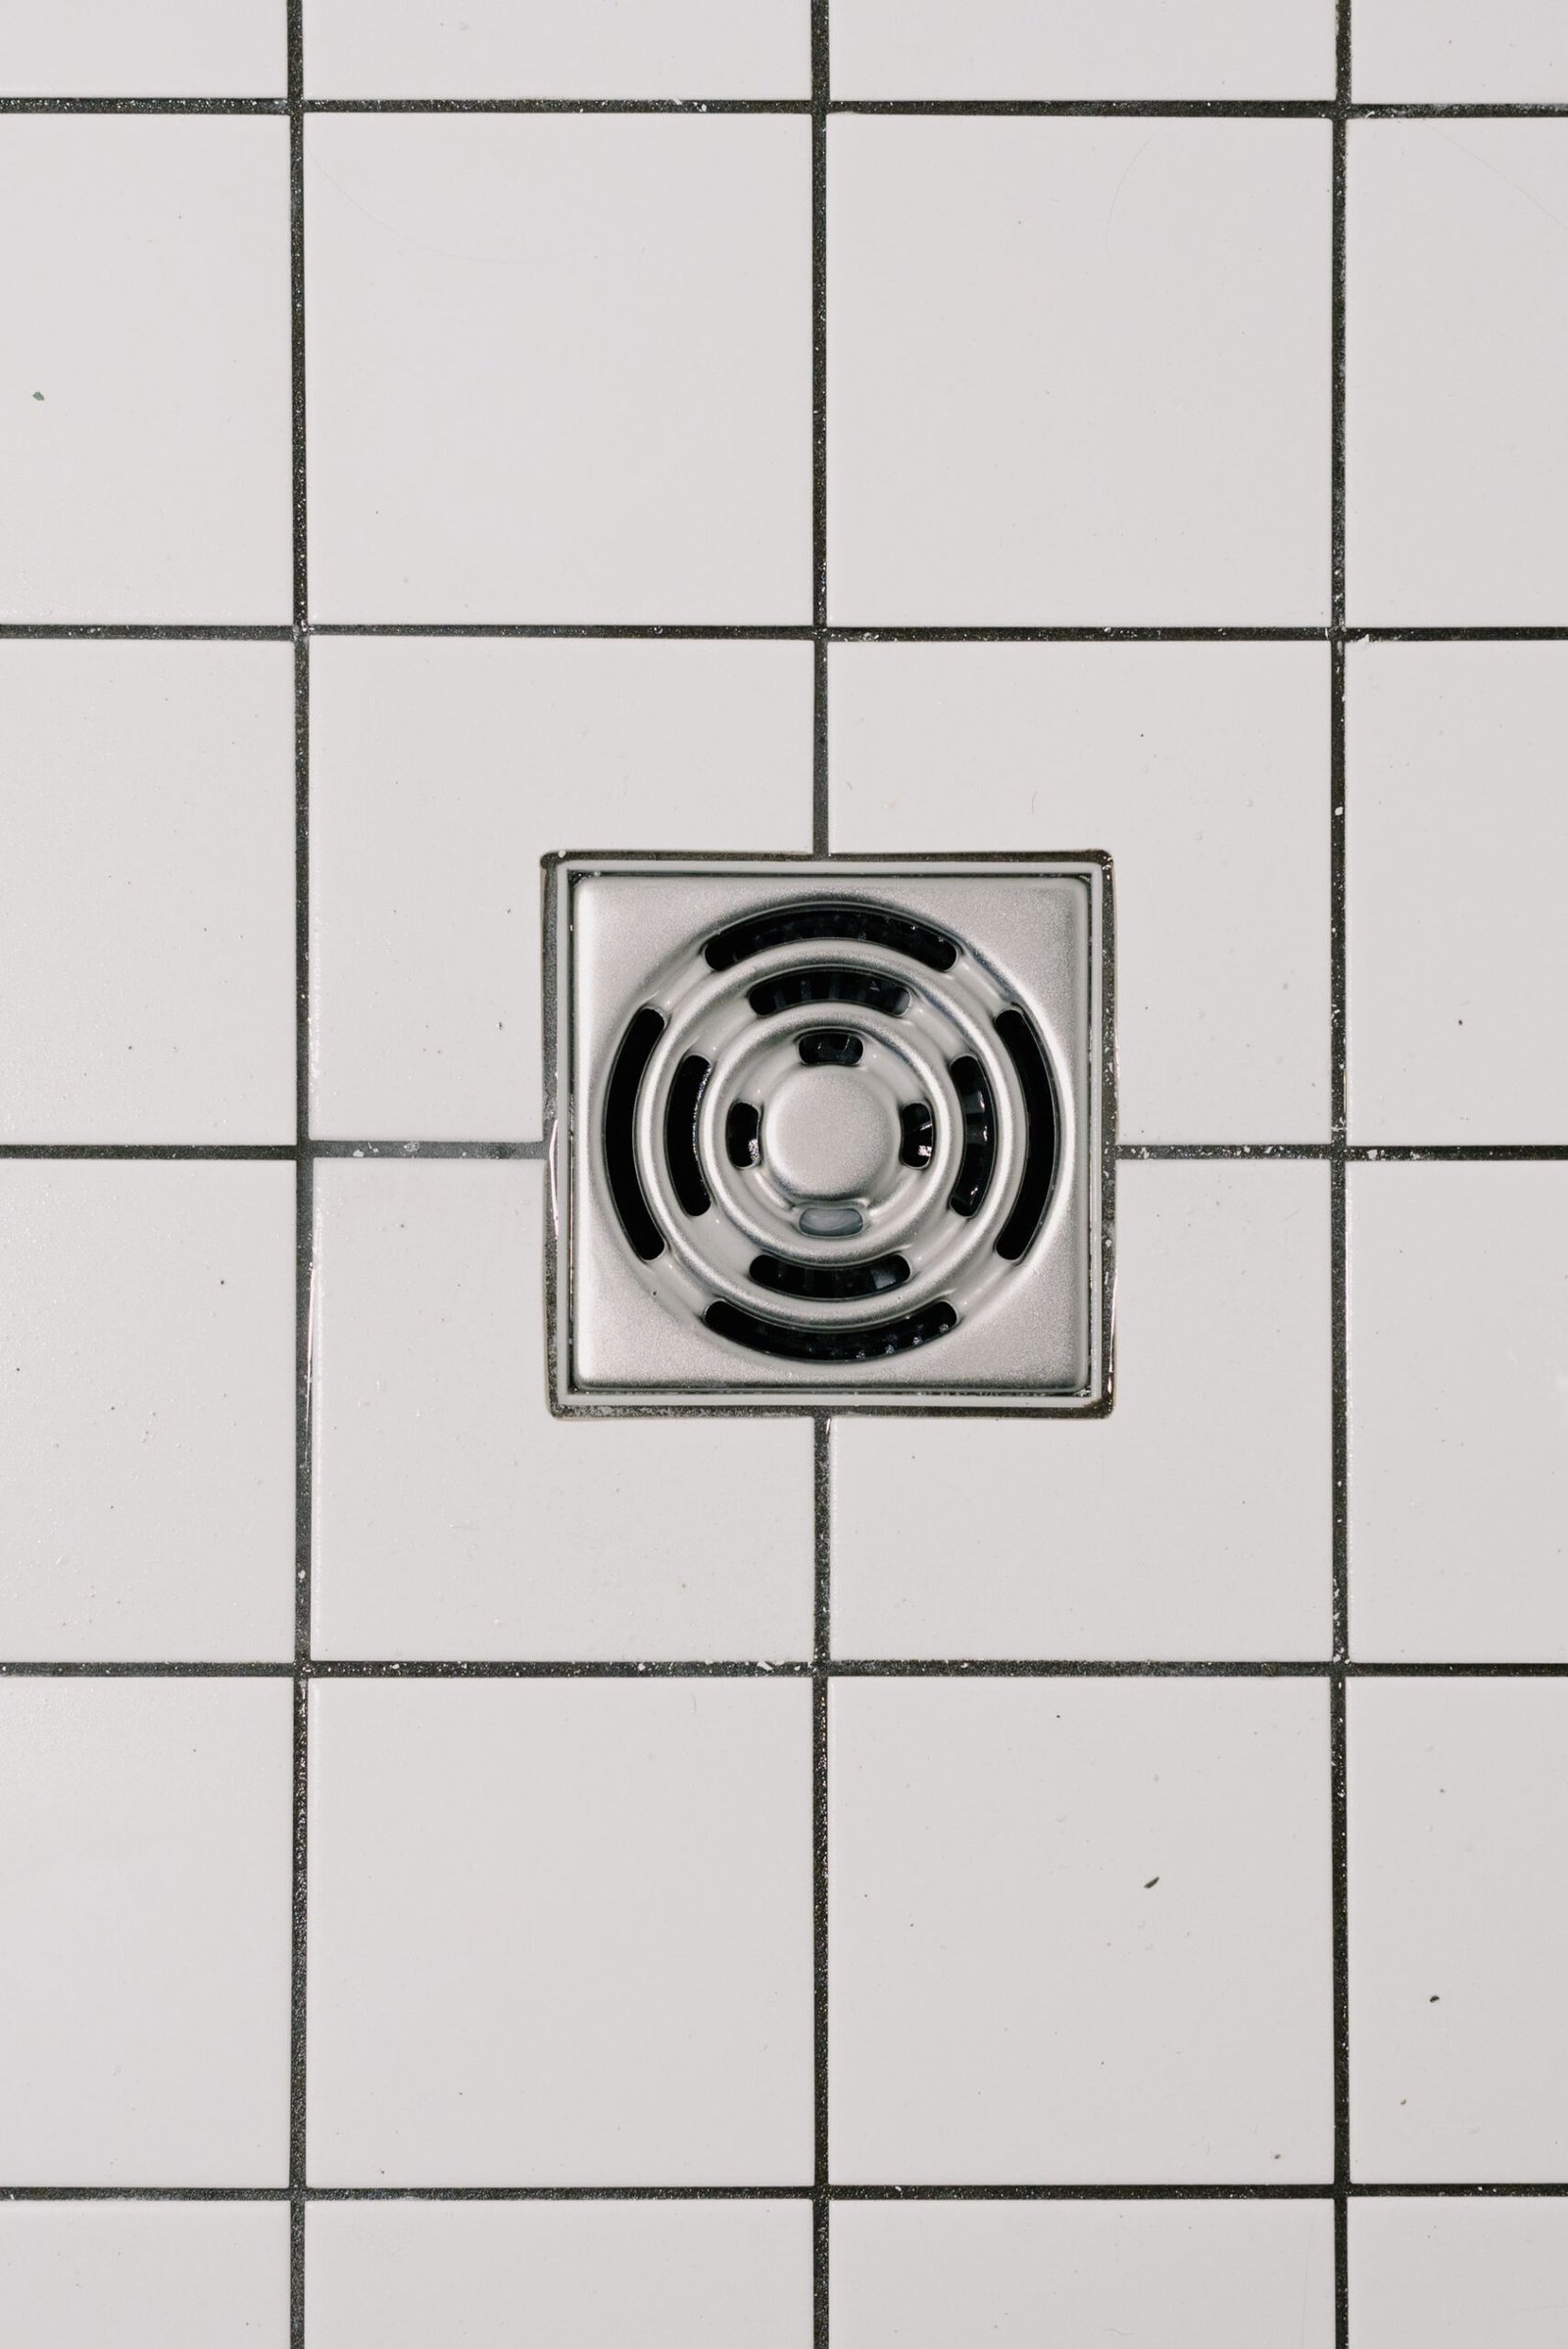
To understand the height involved, a five-foot horizontal run at one-quarter inch per foot needs one and one-quarter inches of fall. That is only the elevation difference created by the slope—not the total recess depth. The supporting layers and drain still need room.
Discuss the drain’s rated capacity against the proposed shower outlets, the plumbing connection, grate removal, and access for cleaning. A beautiful tile-in grate that is awkward to lift can become a daily-use disappointment. A channel at the entrance also cannot catch spray that flies over it.
Choose a layout that keeps daily routines comfortable
Curbless shower with a glass door
This is often a useful starting point for a smaller bathroom. You gain the flush entrance while retaining more control over splash and drafts. Coordinate the door swing, opening width, hardware, and bottom seal with the floor slope. A door should not interfere with a toilet, vanity, or needed maneuvering space.
Fixed screen with an open entrance
A fixed panel can provide the open appearance many homeowners want. Place it to intercept the main spray while preserving a comfortable route inside. Test the showerhead direction and the likely position of a person bathing; the person’s body can redirect water toward the opening.
There is no universal panel length that guarantees a dry bathroom. A deeper shower may offer more separation, but spray pattern, water pressure, opening location, and handheld use all matter. Keep towel storage and the vanity outside the expected splash path.
Full wet room or shared tub-and-shower zone
A larger wet area can accommodate a freestanding tub, shower, and generous circulation. The tradeoffs include more waterproofing, a larger floor to clean, and access around the tub. A narrow gap may look elegant in a rendering but be difficult to maintain.
Before selecting this arrangement, decide where someone dries off and where another person can use the sink without walking through water. A wet room should support the household’s routine, not require everyone to adapt to a photograph.
A former bathtub alcove
A tub footprint can be a promising shower location, but removing the tub does not automatically create accessible space. Check the opening, remaining room width, drain routing, and any planned seat. A folding seat may preserve floor area, while a built-in bench permanently reduces it.
Accessibility, ADA guidelines, and aging in place
A flush entrance can support accessible bathing, but “curbless” and “ADA compliant” are different descriptions. Compliance depends on the complete arrangement and the rules governing the property.
A private home used exclusively as a residence is generally outside ADA Title III. Covered portions of a home used as a public accommodation can be different. Multifamily housing, public accommodations, and other regulated projects may have additional accessibility obligations. The Department of Justice explains residential applicability in §36.207.
| Configuration | Clear finished interior | Entrance and adjacent clearance |
|---|---|---|
| Transfer shower | 36 × 36 inches; these are absolute dimensions | Entrance at least 36 inches; outside clearance at least 36 × 48 inches, measured from the control wall |
| Standard roll-in shower | At least 30 × 60 inches | Opening at least 60 inches along the long face; adjacent clearance at least 30 × 60 inches |
These are selected federal references, not a complete compliance checklist. Interior dimensions are measured at the center points of opposing sides. Seating, controls, grab bars, and exceptions also matter. Source: U.S. Access Board, §608.
California requirements can differ. For example, where California Building Code Chapter 11B applies, standard roll-in adjacent clearance is at least 36 × 60 inches. Its seating and control provisions also differ from the federal baseline. Have the designer establish the applicable occupancy, code chapter, permit edition, and local amendments before labeling a shower compliant. See DSA’s 2025 California Building Code advisory manual.
The Access Board’s bathing-room guide recommends flush transitions and shower slopes no steeper than 1:48—equivalent to one-quarter inch per foot. These details must be coordinated with drainage; making a shower steeper is not an acceptable blanket solution to water problems. Review the Access Board bathing-room guide.
Federal references also set seats at 17–19 inches and horizontal grab-bar gripping surfaces at 33–36 inches above the finished floor. Shower sprays require a hose at least 59 inches long; delivered water must not exceed 120°F. Bar arrangements and control locations depend on shower type and seating. See the federal fixture provisions.
For a homeowner planning ahead, start with the actual user. Can they enter the bathroom, approach the shower, reach the controls before getting wet, and transfer or turn as needed? Include their mobility equipment and any caregiver in the discussion. A compliant minimum does not necessarily provide the best fit for every person.
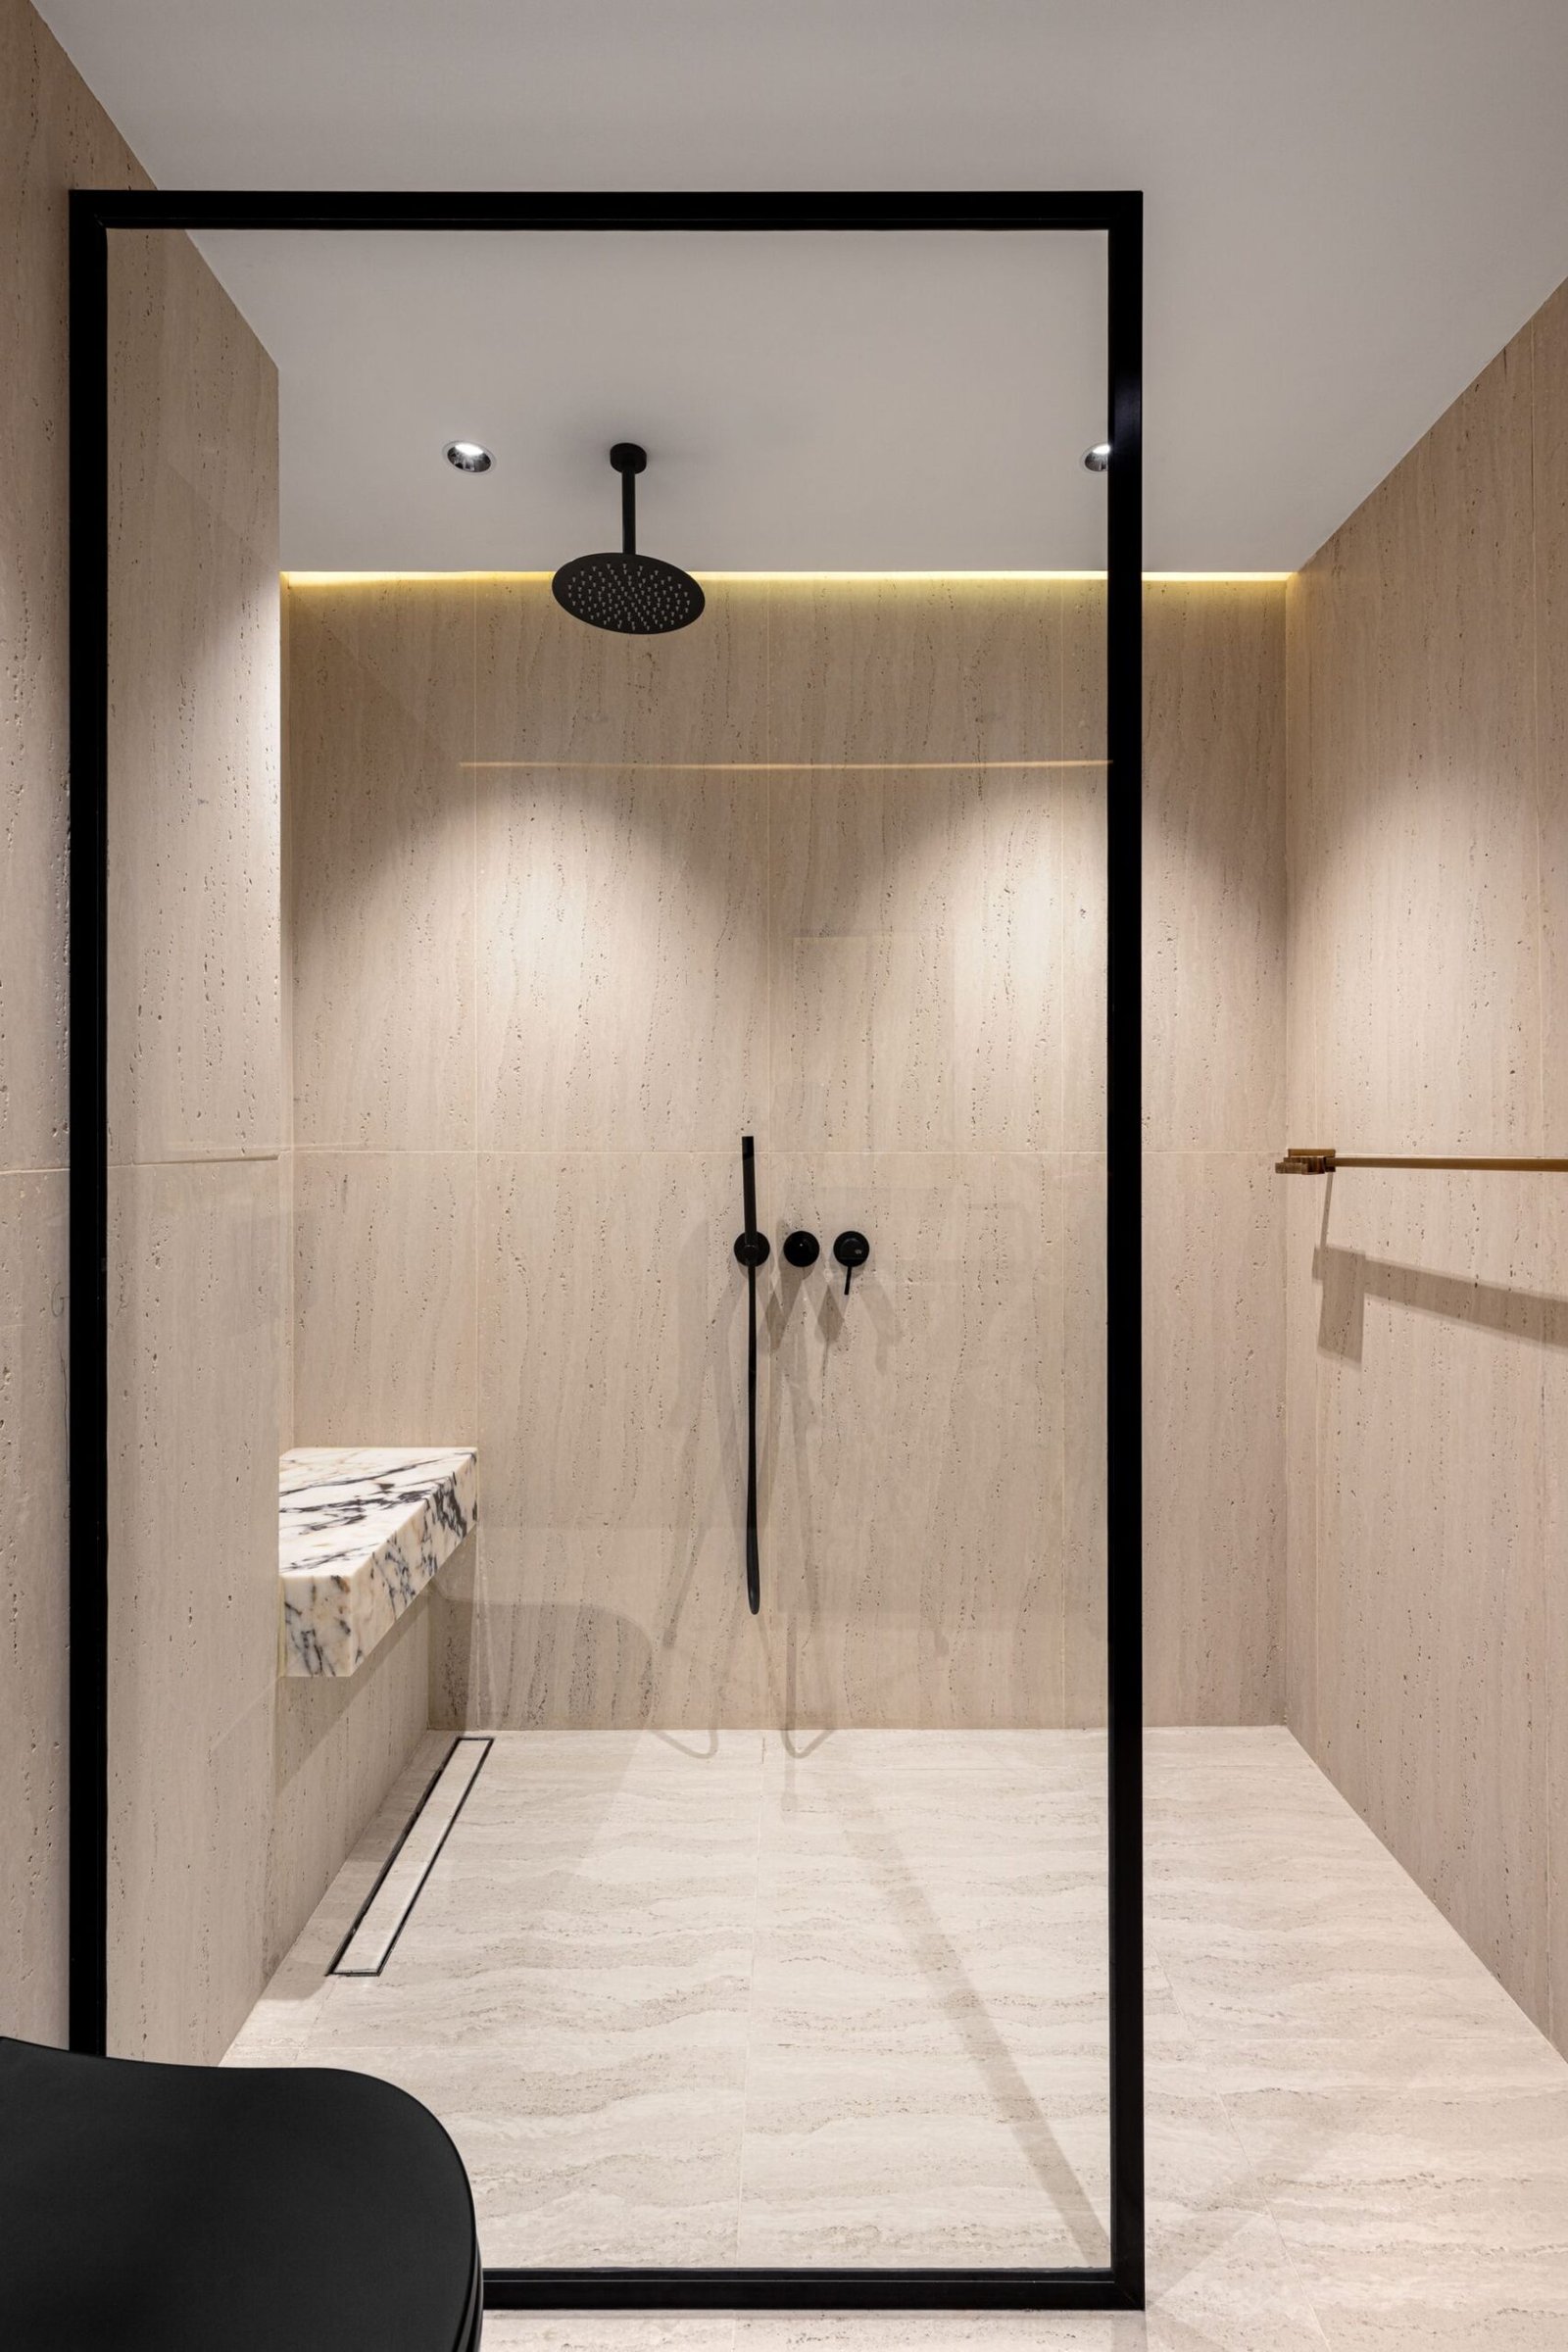
Plan grab-bar and seat support before closing the walls. Consider an adjustable handheld shower, easy-to-operate controls, a reachable niche, good lighting, and a drying area outside the spray. A towel bar should never be mistaken for a structural grab bar.
Tile, fixtures, and the details you notice every day
Choose floor tile specifically approved by its manufacturer for the intended shower-floor use. A product suitable for a bathroom wall or a level interior floor may not be suitable for a sloped, wet, barefoot shower.
Do not rely on a single slip-resistance number as a safety guarantee. Daltile notes that test results do not establish whether someone can slip, and that cleaning, contamination, application, and surface selection matter. Ask for the exact tile’s application guidance, including its finish and size. Daltile explains DCOF testing and its limits.
Small mosaics can suit multiple slopes, but bring more grout joints. Larger tiles can look quieter, yet require compatible floor geometry and careful detailing at changes of plane. Request a tile-layout drawing around the drain and entrance before installation.
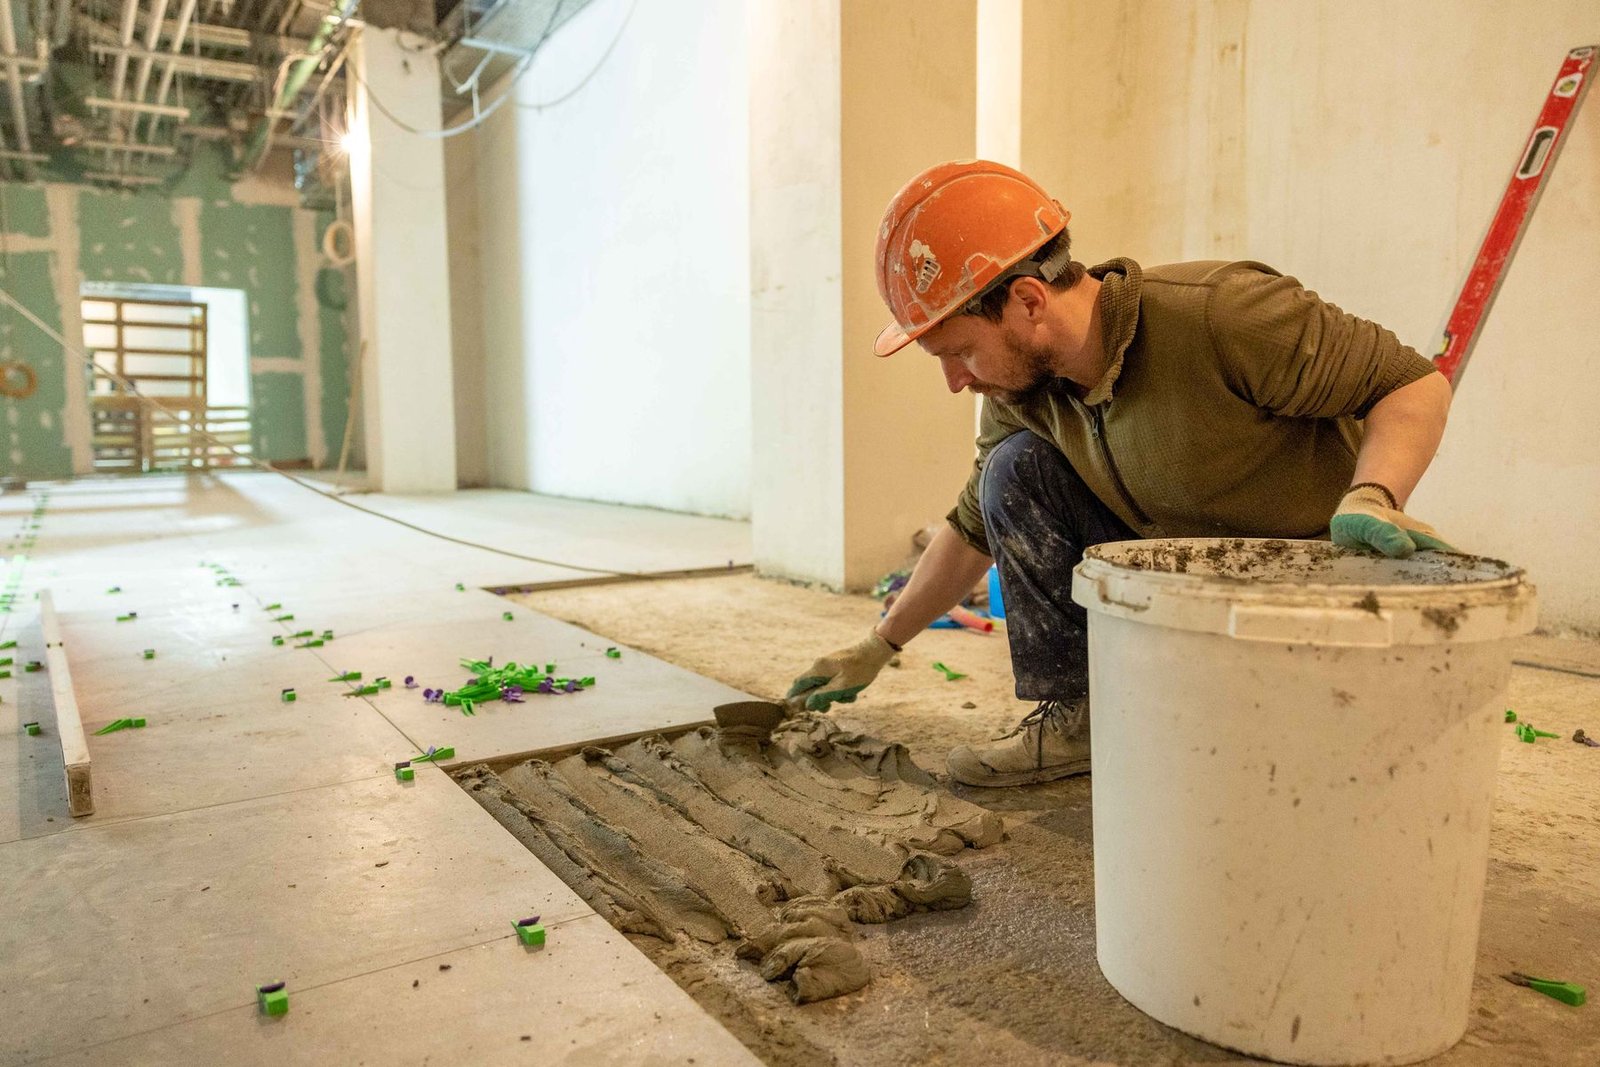
Fixture decisions should begin with function: a reachable valve, useful handheld position, comfortable water delivery, and service access. Compare the actual valve and trim system, replacement-part availability, and finish-care instructions, rather than selecting by brand name alone. Confirm that the proposed number of outlets works with the plumbing and drain design.
For comfort, discuss ventilation, room temperature, and whether an open enclosure will feel drafty. Heated floors can improve comfort when the selected system is approved and properly coordinated, but they do not replace waterproofing or ventilation.
Finally, place niches and bench surfaces so they drain into the shower. Coordinate glass attachments before tile work, including how penetrations will be avoided or treated under the approved system.
What does a curbless shower cost?
The most useful budget separates three questions: What does the shower replacement cost? What extra work makes the entrance flush? How much of the surrounding bathroom must also change?
The figures below are early planning bands synthesized from published contractor guides, reviewed in October 2026. They are not surveyed regional averages or Remodeling Contractor Pro quotations. A site-specific scope is necessary before pricing a project.
| Scope | Early planning context | Items to confirm in the written scope |
|---|---|---|
| Custom curbless shower project | Approximately $15,000–$30,000 | Demolition, substrate, drain, waterproofing, tile, fixtures, glass, and adjoining-floor work; difficult conditions can exceed this band |
| Full midrange bathroom remodel | Approximately $25,000–$50,000 | Whole-room finishes and fixtures; curbless construction must be specifically included |
| Larger primary bathroom or substantial redesign | Approximately $50,000–$90,000 or more | Layout changes, custom finishes, larger wet areas, and structural or plumbing work |
Pricing context: Step Up Builders’ Los Angeles curbless-shower range and Katz Design & Builders’ LA/Orange County bathroom ranges. Scope and inclusions vary; these are outside-provider guides.
These scopes overlap. A full-bathroom budget includes the shower work specified in that proposal; do not add the shower-only band to it.
The curbless premium is not the entire project
Preferred Home Builders publishes a $1,500–$3,000 allowance for curbless floor recessing in its Los Angeles guide. That is a particular modification allowance, not a promise that an existing tiled shower can be converted for that amount. It also should not be added again when another quote already includes the recess. See the source’s separate cost categories.
To compare fairly, request two scopes with the same shower size, finishes, fixtures, and glass: one with a curb and one with a flush entrance. The difference should identify the additional floor, waterproofing, structural, and transition work.
Major cost drivers include a drain that must move, slab investigation and repair, framing changes, damage discovered after demolition, replacement of adjoining floors, custom glass, and premium tile installation. New construction may avoid some retrofit work, but that does not establish a universal percentage saving.
Ask whether design, engineering, permits, disposal, protection of occupied rooms, and repairs outside the bathroom are included. Agree on an explicit contingency for unresolved conditions and require written change orders. A lower number with missing work is not a comparable bid.
An allowance covers an item not fully selected or priced. A contingency reserves money for surprises. Identify allowances already included in the contract and keep any owner-held contingency separate so the same work is not budgeted twice.
The construction checkpoints that matter
A successful project has decisions and inspections before attractive finishes hide the work. Ask the contractor to explain the sequence in the proposal.
- Investigate and design. Confirm the structure, elevations, drainage, room layout, and complete waterproofing assembly.
- Resolve permits and approvals. Establish the required plans and inspections before work starts.
- Complete concealed work. Prepare the support, plumbing, wall backing, and substrates. Verify elevations before installing the shower base.
- Install and test waterproofing. Complete the seams, corners, drain connection, entry transition, and required protection beyond the shower.
- Finish and demonstrate. Install tile and glass, then check drainage and splash behavior with the intended fixtures operating.
A flood test happens before tile
A flood test checks the waterproof assembly by retaining water with the waste line plugged. A curbless shower needs a suitable temporary dam. The test should follow the selected system and the inspector’s requirements, with the water level and results documented.
Do not confuse curing time before the test with the test duration. Schluter recommends at least 24 hours after installing KERDI under normal conditions before water testing; its guidance describes 24 hours as a typical test duration. Other products have different waiting periods. Schluter’s test procedure and LATICRETE’s product-specific guidance explain these differences.
A passed flood test is valuable, but it does not check every spray pattern or prove that the finished floor drains correctly. The final operating check should look for persistent puddles, water traveling through the entrance, and access to the drain for cleaning.
Permits depend on the property address and scope
City of Los Angeles work follows LADBS procedures. Its express-permit bulletin includes qualifying residential bathroom remodels without structural changes and separately lists plumbing-fixture replacement. “Express” does not mean permit-free, and keeping a fixture in the same location does not automatically remove permit requirements. Structural changes can require a different review. Consult the LADBS bulletin.
The San Fernando Valley is not one permitting jurisdiction. Burbank, for example, publishes its own process. Orange County cities also have their own departments, while OC Development Services handles unincorporated county areas. Confirm the authority for your address and which work must remain exposed for inspection. Burbank permits; OC Development Services.
The proposal should identify who obtains permits and schedules inspections. Keep the permit numbers, inspection approvals, waterproofing-test record, and concealed-work photos with your project documents.
Questions homeowners ask before committing
Can we just remove the existing curb?
Usually, that is not a complete conversion. The curb may be part of the waterproofing termination, and the existing floor heights may depend on it. Establish how the new floor will slope, how the entrance will be waterproofed, and what adjoining finishes must be rebuilt before removing anything.
Will water run into the bathroom?
It can if the layout, slope, enclosure, or drainage is unsuitable. A door, better screen placement, or revised showerhead direction may help. Water containment should be designed and checked during use; a curbless label cannot guarantee a dry floor outside the shower.
Can the bathroom floor stay?
Sometimes, but the transition needs a workable waterproofing connection and matching elevations. Keeping every existing tile is not always compatible with a sound entry detail. Ask the contractor to identify the area of flooring included in the proposal.
Is it harder to maintain?
Maintenance changes rather than disappearing. Remove hair from the drain, clean the grate and channel as directed, use products suitable for the tile and fixtures, and inspect sealant joints. Address slow drainage promptly because there is no curb providing extra containment.
How long will the work take?
Request a schedule tied to the actual scope. Design, approvals, concealed repairs, cure periods, inspections, and custom glass can affect completion. Ask how long the bathroom will be unusable and which materials must arrive before demolition, especially if this is the household’s only bathroom.
Get a Free Architectural & Construction Estimate
Bring a contractor your goals as well as your inspiration photos. Explain whether the priority is an open appearance, easier entry, seated bathing, caregiver access, or preparing the home for changing needs.
Ask prospective contractors how they will establish floor elevations, choose the waterproofing system, document testing, and coordinate tile with glass. Request examples of comparable work and verify the contractor’s license information through the California Contractors State License Board. A useful proposal makes concealed construction as clear as the finish selections.
Contact Remodeling Contractor Pro to discuss your curbless shower or bathroom remodel. Share the property location, approximate room dimensions, photos, and any accessibility needs. We can discuss your project in Los Angeles, the San Fernando Valley, or Orange County and confirm service availability for your address.
The conversation should begin with what your home can support and what you need from the room. From there, the layout, construction approach, and budget can become a coordinated plan.
Construction drawings are original educational schematics, not permit drawings or installation instructions. Final details depend on the structure, selected products, applicable requirements, and project design. Manufacturer names identify examples, not endorsements or a claim of contractor certification.